AosCore on x86 VM
The next article provides instructions how to build x86 machine image with AosCore.
You can fetch/clone this whole repository, but you actually only need one file from it: aos-vm.yaml. During the build moulin will fetch this repository again into yocto/ directory. So, to reduce possible confuse, we recommend to download only aos-vm.yaml:
mkdir aosvm
cd aosvm
curl -O https://raw.githubusercontent.com/aoscloud/meta-aos-vm/v4.0.5/aos-vm.yaml
Building
Moulin is used to generate Ninja build file: aos-vm.yaml. This project provides number of additional parameters. You can check them with --help-config` command line option:
moulin aos-vm.yaml --help-config
usage: moulin aos-vm.yaml [--NODE1 {no,yes}] [--NODE2 {no,yes}] [--VIS_DATA_PROVIDER {renesassimulator,telemetryemulator}]

Config file description: Aos virtual development machine

options:
  --NODE1 {no,yes}      builds additional node 1
  --NODE2 {no,yes}      builds additional node 2
  --VIS_DATA_PROVIDER {renesassimulator,telemetryemulator}
                        specifies plugin for VIS automotive data
By default, the build produces two nodes . Generate ninja configuration and perform a build:
moulin ./aoa-vm.yaml
ninja
The generated images locations:
image
└── yocto
    ├── build-node0
    │   └── tmp
    │       └── deploy
    │           └── images
    │               └── genericx86-64
    │                   └── aos-vm-node0-genericx86-64.wic.vmdk
    └── build-node1
        └── tmp
            └── deploy
                └── images
                    └── genericx86-64
                        └── aos-vm-node1-genericx86-64.wic.vmdk
To run generated images QEME tool is using. The tool should be installed on hast system:
sudo apt install qemu-system-x86
The downloded repo contains a script that could be used to start nodes. Run script and follow instructions on how to setup networks and access nodes.
sudo yocto/meta-aos-vm/doc/run_aos_vm.sh image/

Credentials to nodes login:
Login: root
Password: Password1
Provision your device.
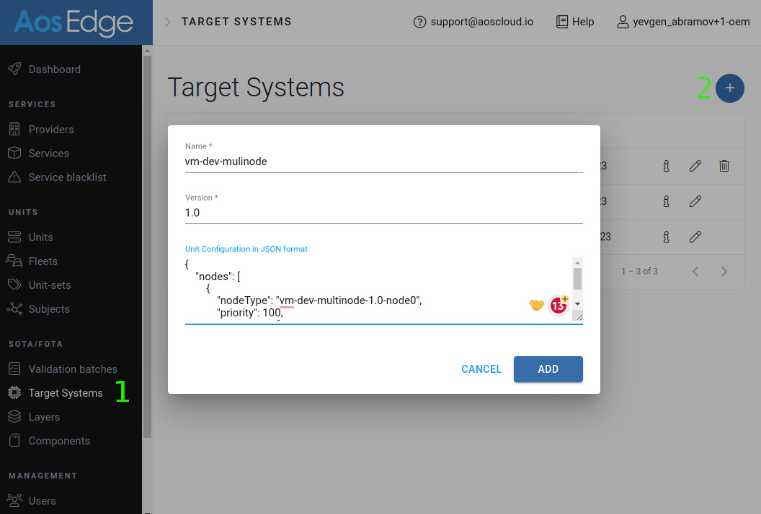
To use the whole AosEdge functionality appropriate target system. Login to aoscloud.io as OEM. And create a target system with the name "vm-dev-mulinode".
Use https://github.com/aoscloud/meta-aos-vm/blob/v4.0.5/doc/aos_unit.cfg file content in Unit configuration field

Perform unit provisioning
aos-prov -u 10.0.0.100