sample - C++ Hello World
This repository contains a C++ Hello World example for building and deploying the service on the AosEdge platform.
Follow this guide to download and install the SDK, set up your environment, compile the service, create the service on AosCloud, compile the service, sign and upload the service version.
You can explore the example by checking out the source code.
Prerequisites
- Target unit: a supported platform (VirtualBox or Raspberry Pi).
- AosCloud accounts: EOM and SP accounts for AosCloud. See the AosEdge dictionary for user types and the Get access page for login help.
- Tools: AosCore SDK, CMake, Bash, Wget, Python and a virtual environment (
venv) are installed.
Prepare unit
Before proceeding, make sure you:
- download AOS SDK.
- install AOS SDK.
For detailed instructions on how to set this up, please refer to the following guide. Please see Download SDK and Install and set up SDK chapters.
Compile service example with CMake
The source code of the example you can download
mkdir -p build
cd build
cmake ..
make
Compile service example manually
The source code of the example you can download
VirtualBox environment
x86_64-aosvm-linux-g++ --sysroot=/opt/aos-vm-dev/${AOS_RELEASE_VERSION}/sysroots/core2-64-aosvm-linux main.cpp -o hello_world
Raspberry Pi environment
aarch64-aos-linux-g++ --sysroot=/opt/aos-core-sdk/raspberrypi5/${AOS_RELEASE_VERSION}/sysroots/cortexa76-aos-linux/ main.cpp -o hello_world
Create service on AosCloud site
To create the AosEdge service you've been logged in as an SP user. User types are defined on AosEdge dictionary. If you have problems with the login, please refer to the Get access page.
-
On AosCloud, go to Services and click the plus button in the top-right corner of the screen to start creating the service.

-
Enter all required values that are marked:
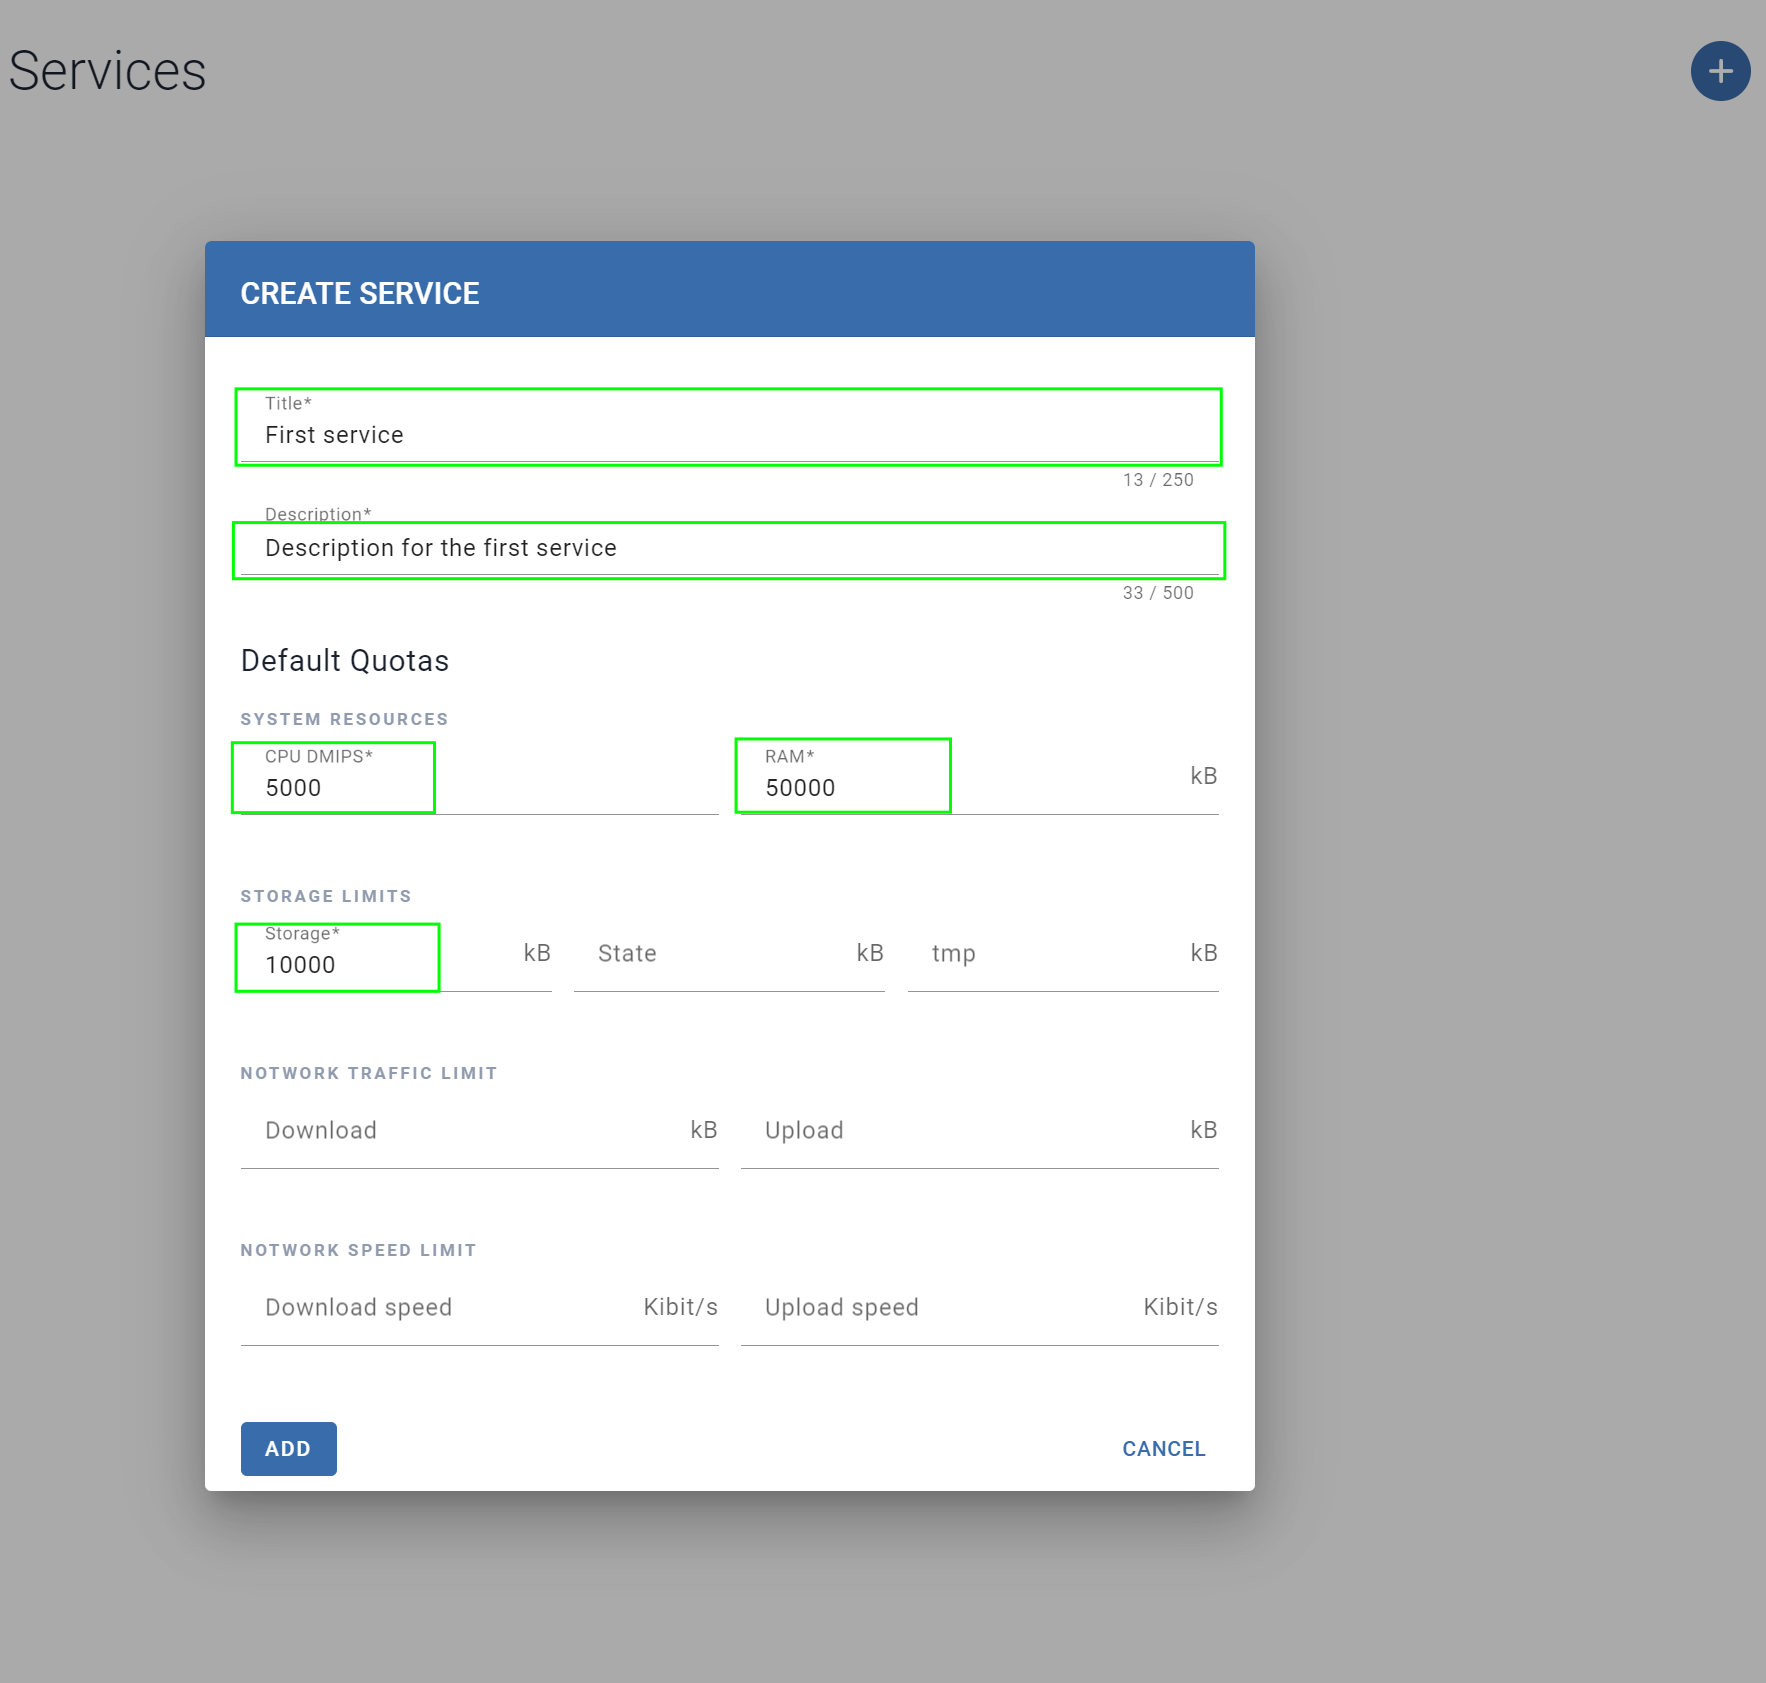
- the service name under Title
- a description under Description
- required resources:
- CPU DMIPS
- RAM in kB
- Storage in kB
-
Click Add to complete the service creation.
-
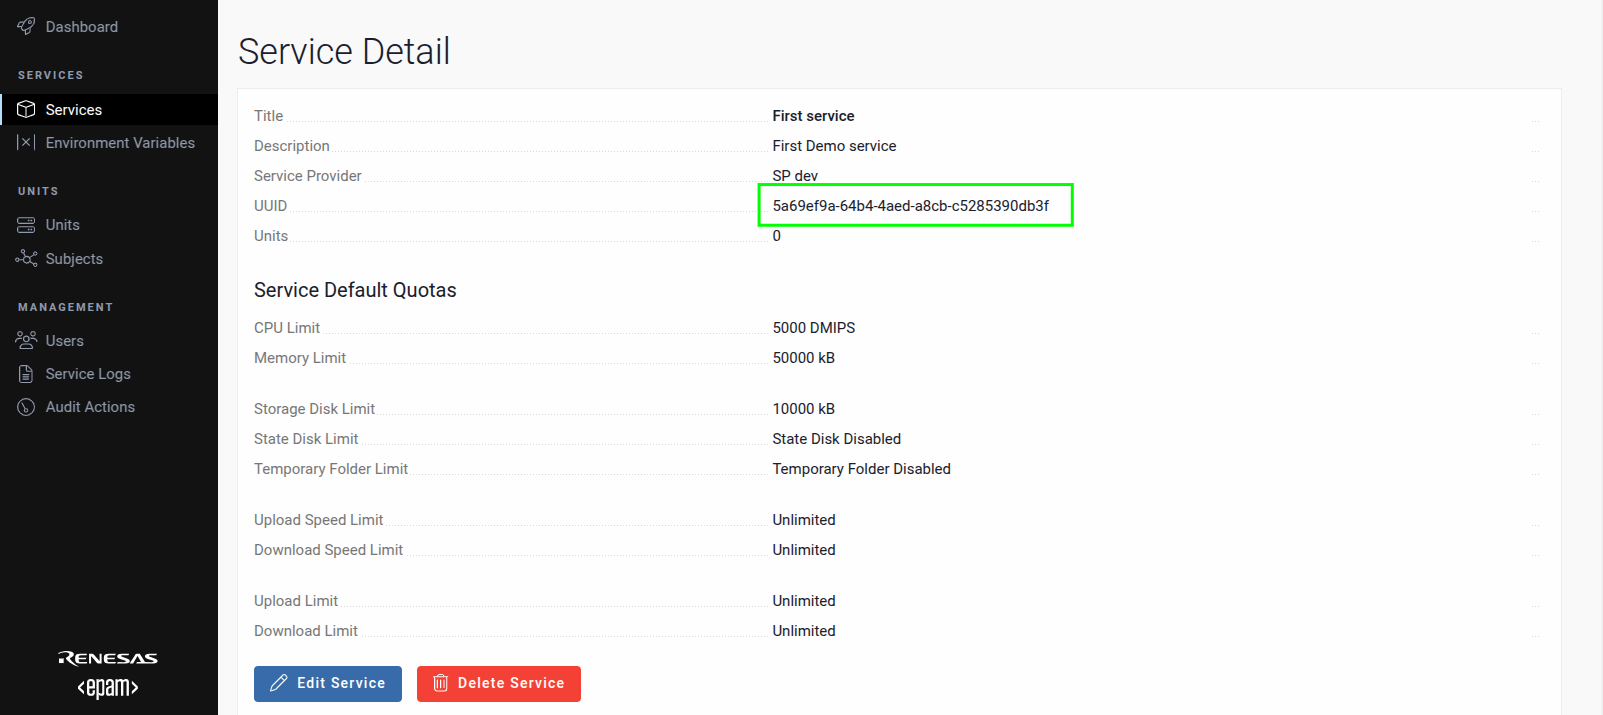
After creating the service, click its Title to access the Service Detail screen. Copy the value from the UUID field and save it for future use.
Prepare service for upload
Before signing and uploading your service to AosCloud, prepare the service by organizing the compiled binary and updating the configuration with the service UUID obtained from the Create the service on AosCloud step.
- Move compiled service binary
Copy or move the compiled hello_world binary to the service source directory:
mv hello_world ./rootfs
Ensure the binary is in the ./rootfs directory, as this is where the aos-signer tool expects it.
- Update the service configuration
Open the service configuration file ./meta/config.yaml and update the service_id field with the UUID you copied from the Service Detail screen in AosCloud:
nano ./meta/config.yaml
Example config.yaml:
service_id: <YOUR_SERVICE_UUID>
Replace <YOUR_SERVICE_UUID> with the UUID saved earlier. Save and close the file.
Sign and upload service version
Use the aos-signer go tool to sign and upload your service to AosCloud.
In the service directory, run:
~/.aos/venv/bin/python3 -m aos_signer go
Expected output:
Starting SERVICE SIGNING process...
Starting CONFIG VALIDATION process...
Validating config...           VALID
Copying application...         DONE
Copying configuration...       DONE
Copying default state...       SKIP
Creating archive...            DONE
Sing package...       DONE
Creating service package...            DONE
*
Starting SERVICE UPLOAD process...
Starting CONFIG VALIDATION process...
Validating config...           VALID
Uploading...                   DONE
On success, the output ends with an Uploaded message. Verify the service details on the Services section of AosCloud.
Creating subject
A Subject in AOS Cloud is a text identifier that links the service to a specific unit. Follow the steps below to create and configure a subject.
Copy system ID of the unit
-
Navigate to the Units section in AOS Cloud.
-
Locate the desired unit and copy its System ID. This will be used in later steps.

Create new subject
-
Go to the Subjects section.
-
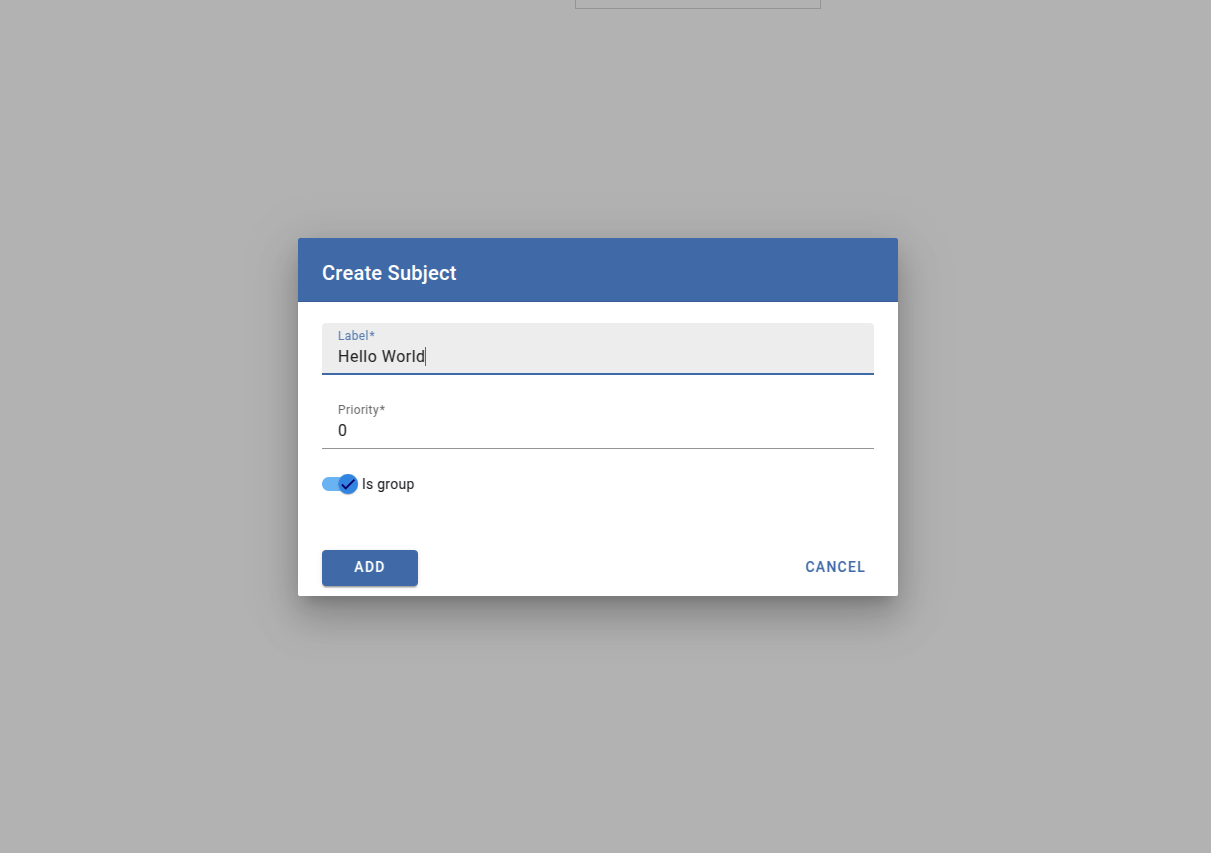
Click the + button to create a new subject.
-
Enter a Label ID for the subject and save.
Access Subject
-
After creation, the new subject will appear in the subjects list.
-
Click on the subject you just created to configure it.

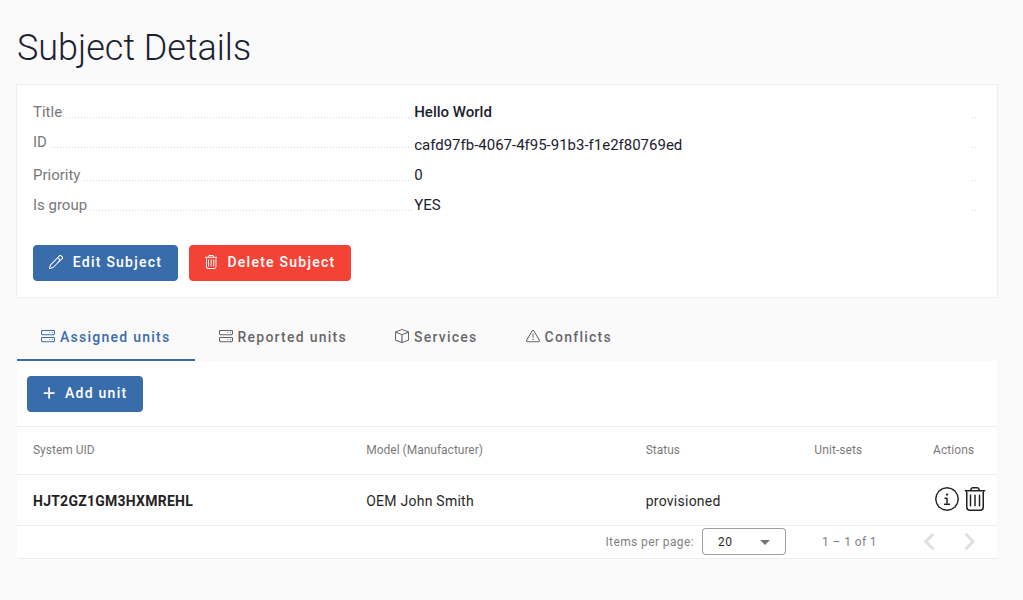
Assign unit to subject
-
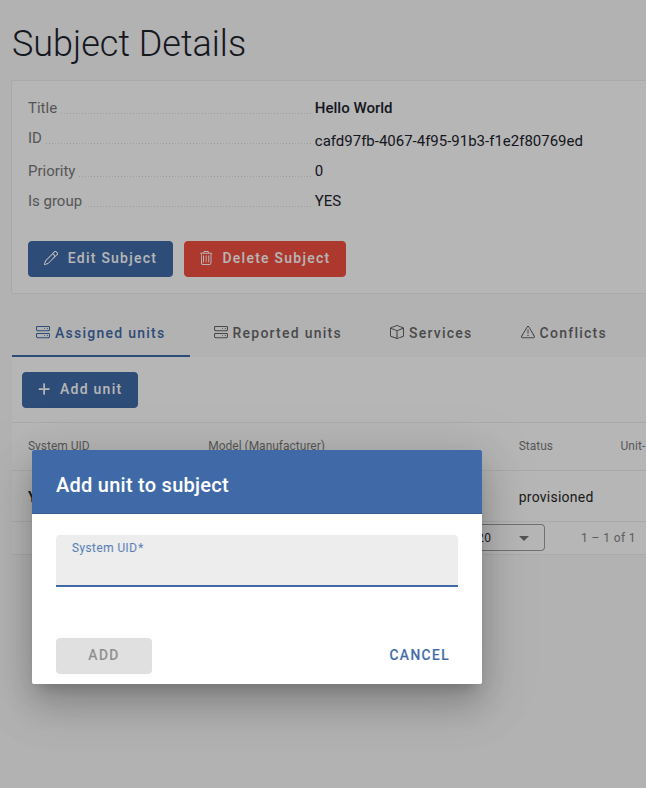
In the subject configuration, navigate to the Assigned Units tab.
-
Click Add Unit.
-
Paste the System ID copied in Step 1 and confirm.
-
The unit will now be associated with the subject.
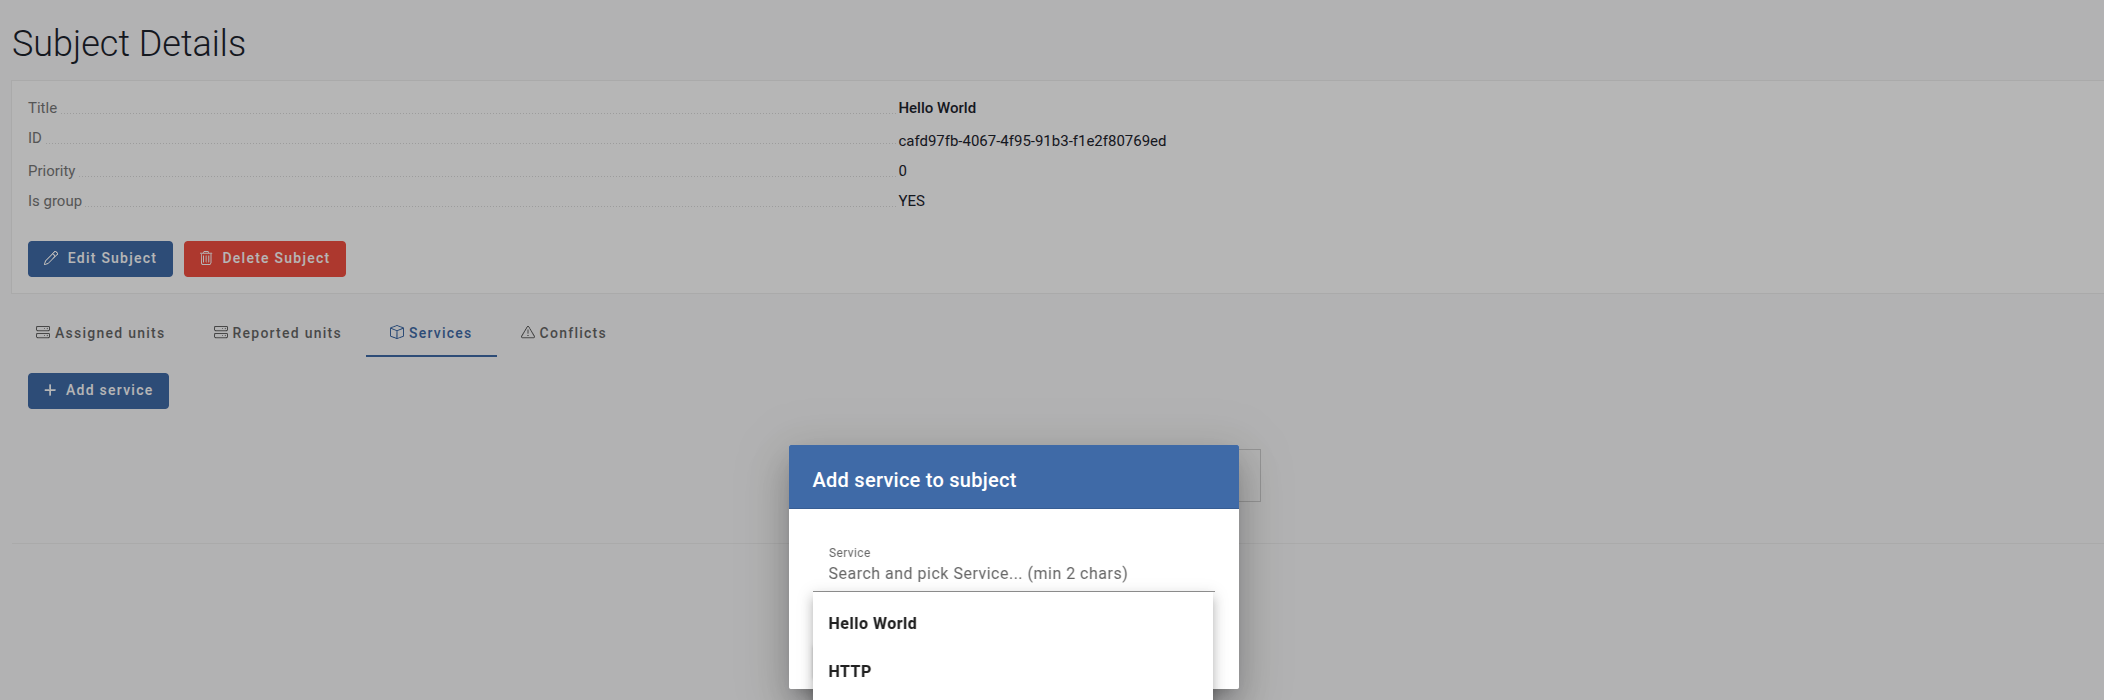
Assign service to subject
-
Navigate to the Services tab in the subject configuration.
-
Click Add Service.
-
Select the desired service from the available list and confirm.
-
The service will now be linked to the subject.
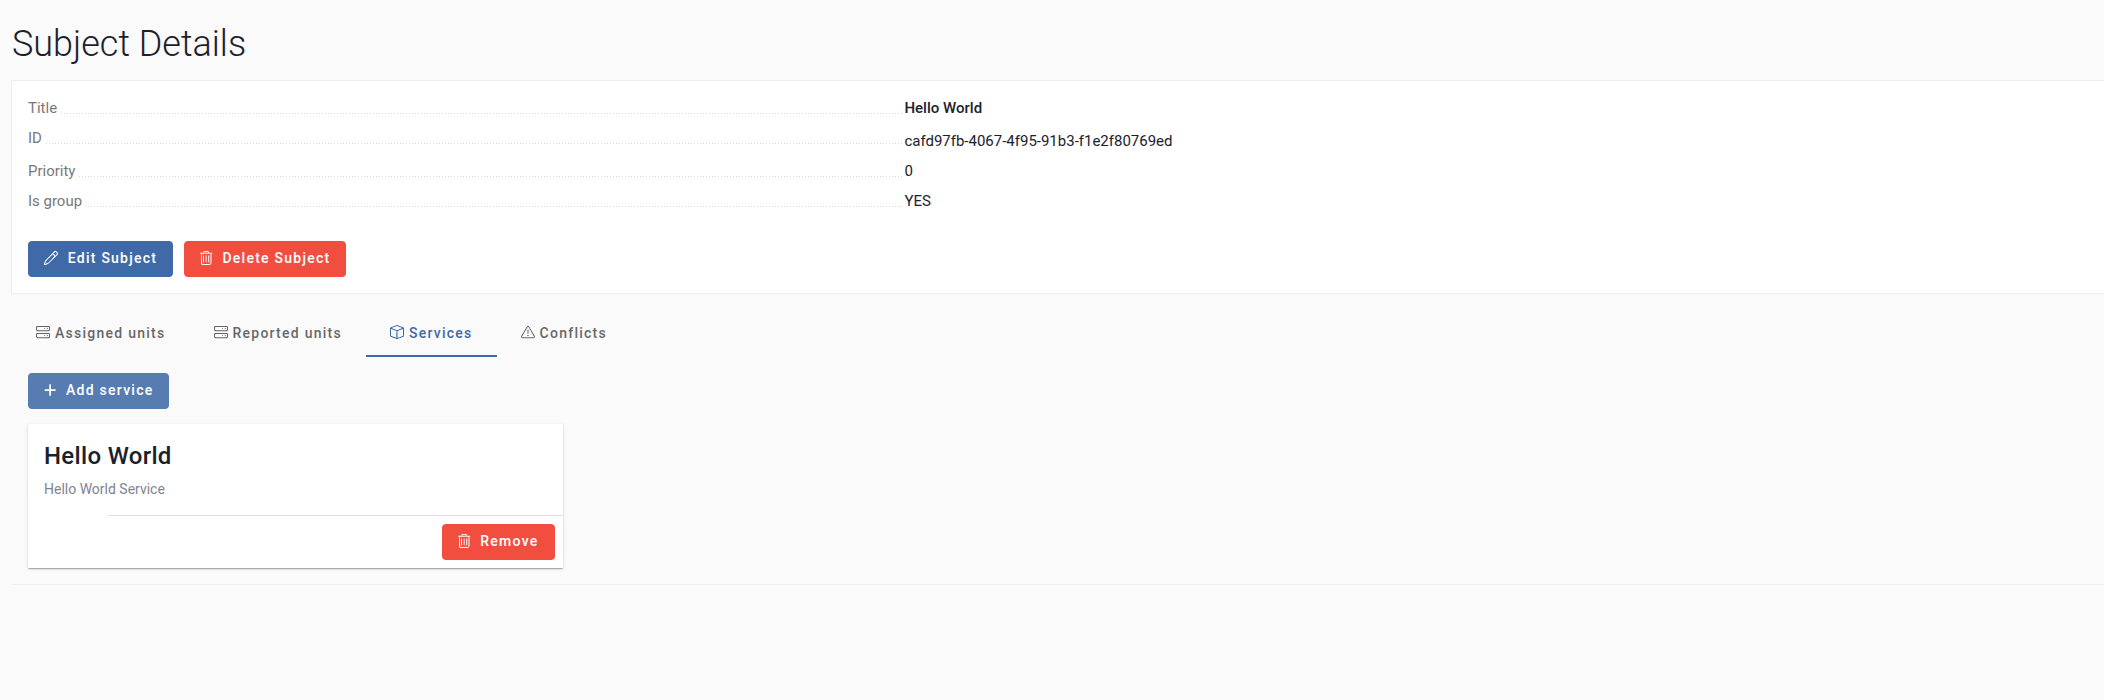
You have successfully created a subject in AOS Cloud, assigned a unit using its System ID, and linked the service to it. This configuration ensures that the specified service is associated with the designated unit via the subject.
Approve service
-
Go to Validation batches.
-
Select your service.

-
Click Approve to confirm the service.
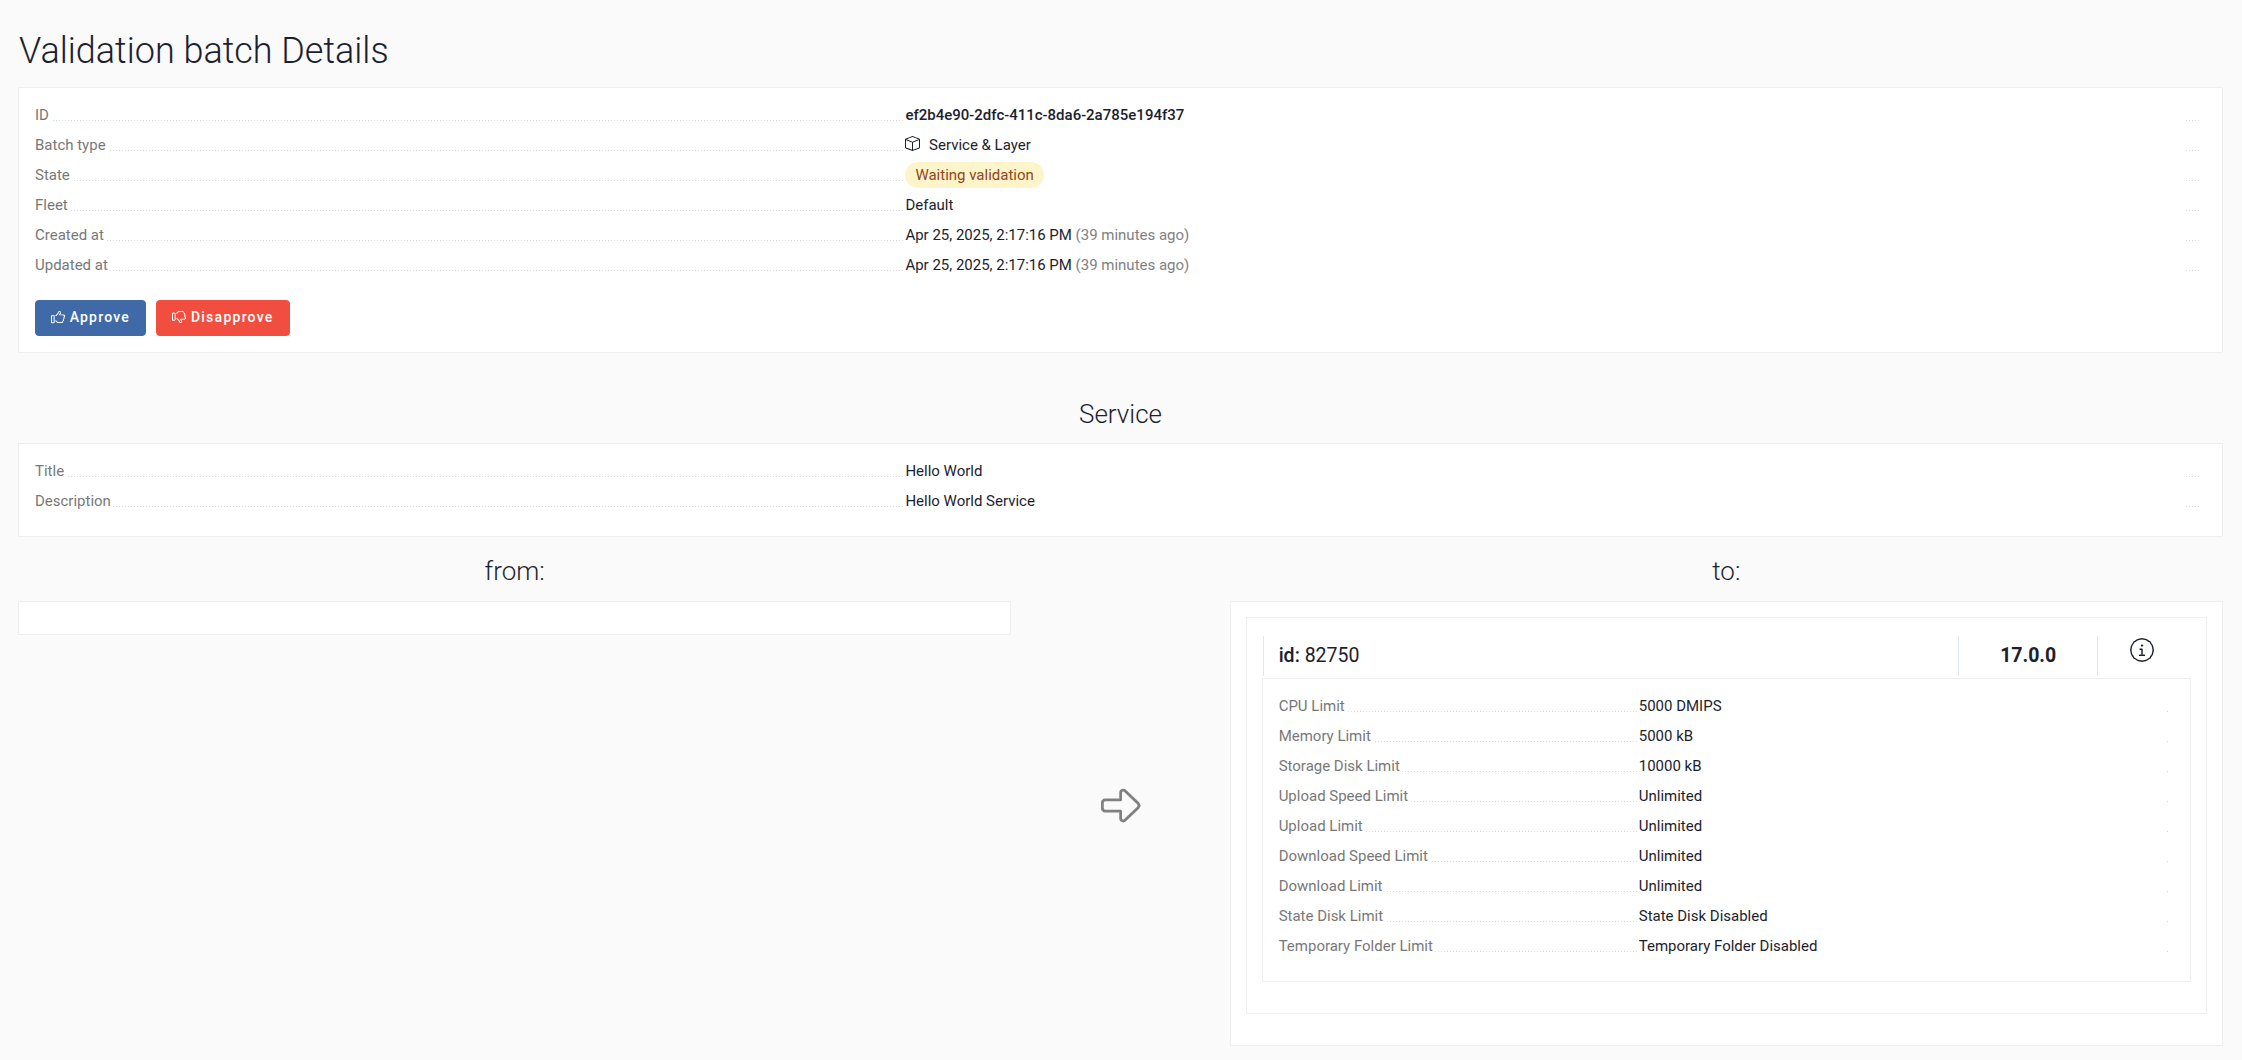
At this stage, the service is applied to our environment.
Validate result of service
There are several effective methods for locating, retrieving, and analyzing logs. Below are some of the most commonly used approaches:
Accessing logs via AosCloud
-
Go to Unit system logs and click the + button.
Fill in the required information to request logs.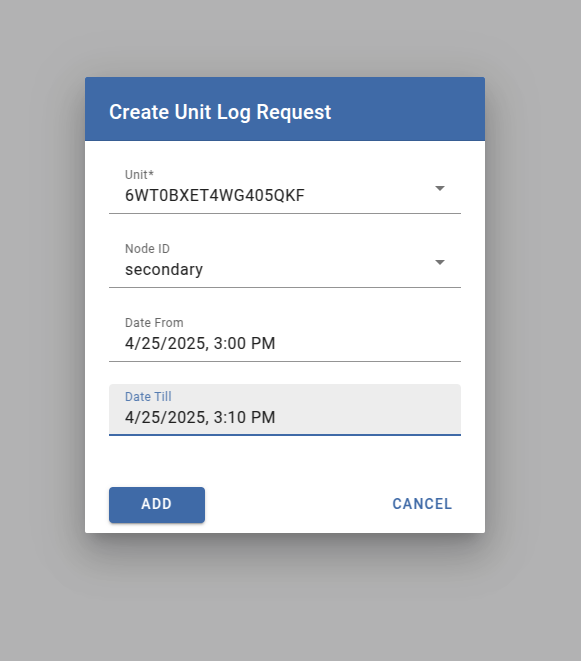
-
Wait until the logs are available, then download them.

-
Open the log file in a text editor and search for the message
"Hello, World!!!".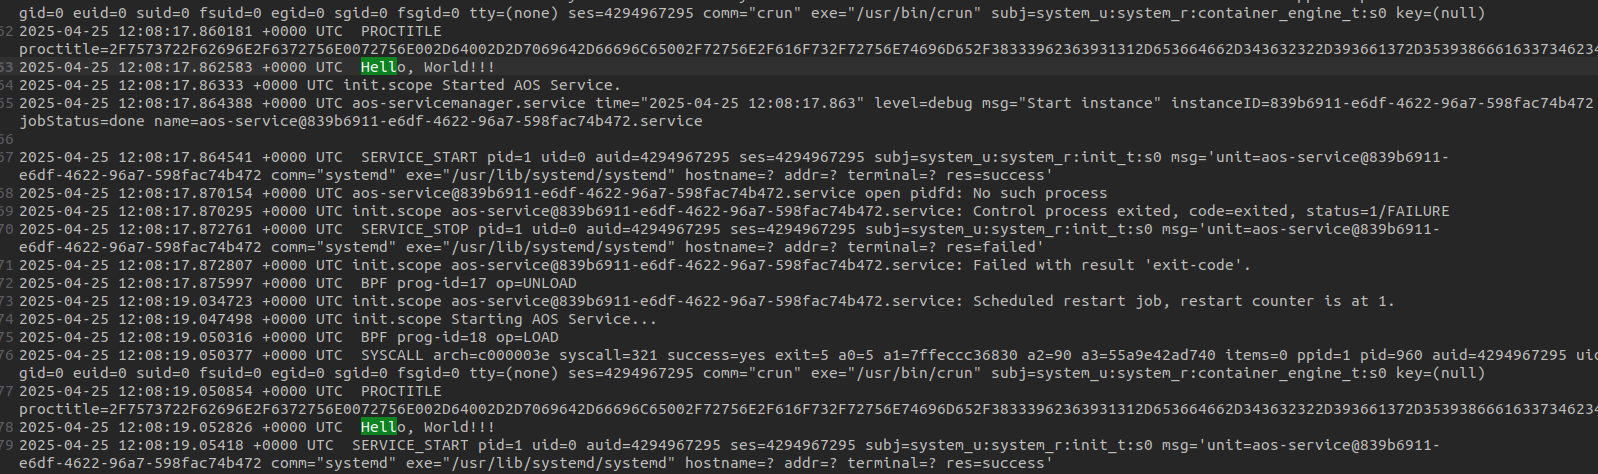
If the message is found, the service is working correctly.
Accessing logs via SSH
To retrieve logs from a device using SSH, ensure that the device is connected to the same network as your host machine.
VirtualBox Environment
- Visit the SSH access to provisioned unit page for detailed instructions.
- Follow the steps to establish an SSH connection with the virtual device.
- Refer to the guide on Getting logs and service instances status for comprehensive information on retrieving logs and checking the status of services.
Raspberry Pi Environment
- Visit the SSH access to provisioned unit section in the Raspberry Pi setup guide.
- Follow the instructions to connect to the device via SSH.
- Refer to the guide on Getting logs and service instances status for detailed information on accessing logs and monitoring service instances.