Build and provision your HPC device
Already introduced build images such as AosVM and AosEdge for Rpi5 are pre-built reference system configuration images that include scripts which automate provisioning.
If you have a target device to be managed by AosEdge, this page explains how to
- build your custom image including AosCore
- flash the built image to your device
- provision the device as Unit.
AosEdge is able to manage various types of devices. However, managing HPC (High Performance Computing) device would be highly beneficial due to AosEdge's capability to manage and flexibly update complex system configuration that includes multiple VMs and mixed-critical workloads.
Prerequisite
You should have understanding and experience in below:
- Working with embedded hardware and software
- Using build tools (Yocto, Moulin, etc.)
- Linux and any other OS/etc. such as Xen Hypervisor, Zephyr RTOS depending on your system configuration
Decide your system configuration
AosEdge can work with various system configurations. Current reference implementations are available for below:
- Linux only
- Linux on Xen Hypervisor with Zephyr RTOS as thin control domain
Any other system configuration will require deeper custom integration, which will not be discussed here. In such case, please consult your AosEdge support if needed.
Prepare build tools
Prepare your host machine with necessary build tools.
See Tutorial > Setup your device with AosCore for details to prepare these tools.
Build image with AosCore
With the downloaded tools, you can build your firmware/OS image with AosCore.
General build instruction
This integration document provides the most generic and holistic instruction to build your image with AosCore integrated.
Reference integrations
- meta-aos-vm (https://github.com/aosedge/meta-aos-vm)
- Builds AosVM with two Linux nodes.
- Can be utilized to build simple image with only Linux.
- meta-aos-rpi (https://github.com/aosedge/meta-aos-rpi)
- Builds AosEdge for Rpi5, which includes Linux and Zephyr RTOS on Xen Hypervisor.
- Most suitable to enable mixed-critical environment.
- Can also be utilized to build Linux only image by removing Xen
- Necessary modules are already enabled for various peripheral device access.
- Currently not maintained
- Building image as x86 virtual machine - If you want to build image alike to AosVM, Tutorial > AosCore on x86 VM may help you.
- Building image for Renesas R-Car - If you want to build image for Renesas R-Car hardware, Tutorial > AosCore on R-Car may help you.
https://github.com/aosedge/meta-aos-rpi/blob/main/README.md
Flash image to your device
Once you have the firmware/OS image built, you can flash the image to your target device.
Please follow your target device's instructions for specific procedures.
Here we have below examples:
- Raspberry Pi *Within AosEdge for Rpi5 instruction
- R-Car Starter Kit Premier *Currently not maintained
- R-Car S4 Development Board/Spider *Currently not maintained
Provision device as Unit
Now that you have your device flashed with image that is properly configured and built, AosEdge should be able to provision the device as Unit.
See Tutorial > Provision a device for details.
See Tutorial > Aos CLI Tools > aos-prov for details on the provisioning tool aos-prov.
If you are using AosVM image for your custom Linux image, you may want to run the command aos-prov provision --nodes 1, aos-prov expects two nodes by default. See above tutorial for detail.
Confirm the registered information
Once the provisioning was successful, you should be able to confirm the Unit details recognized by AosEdge.
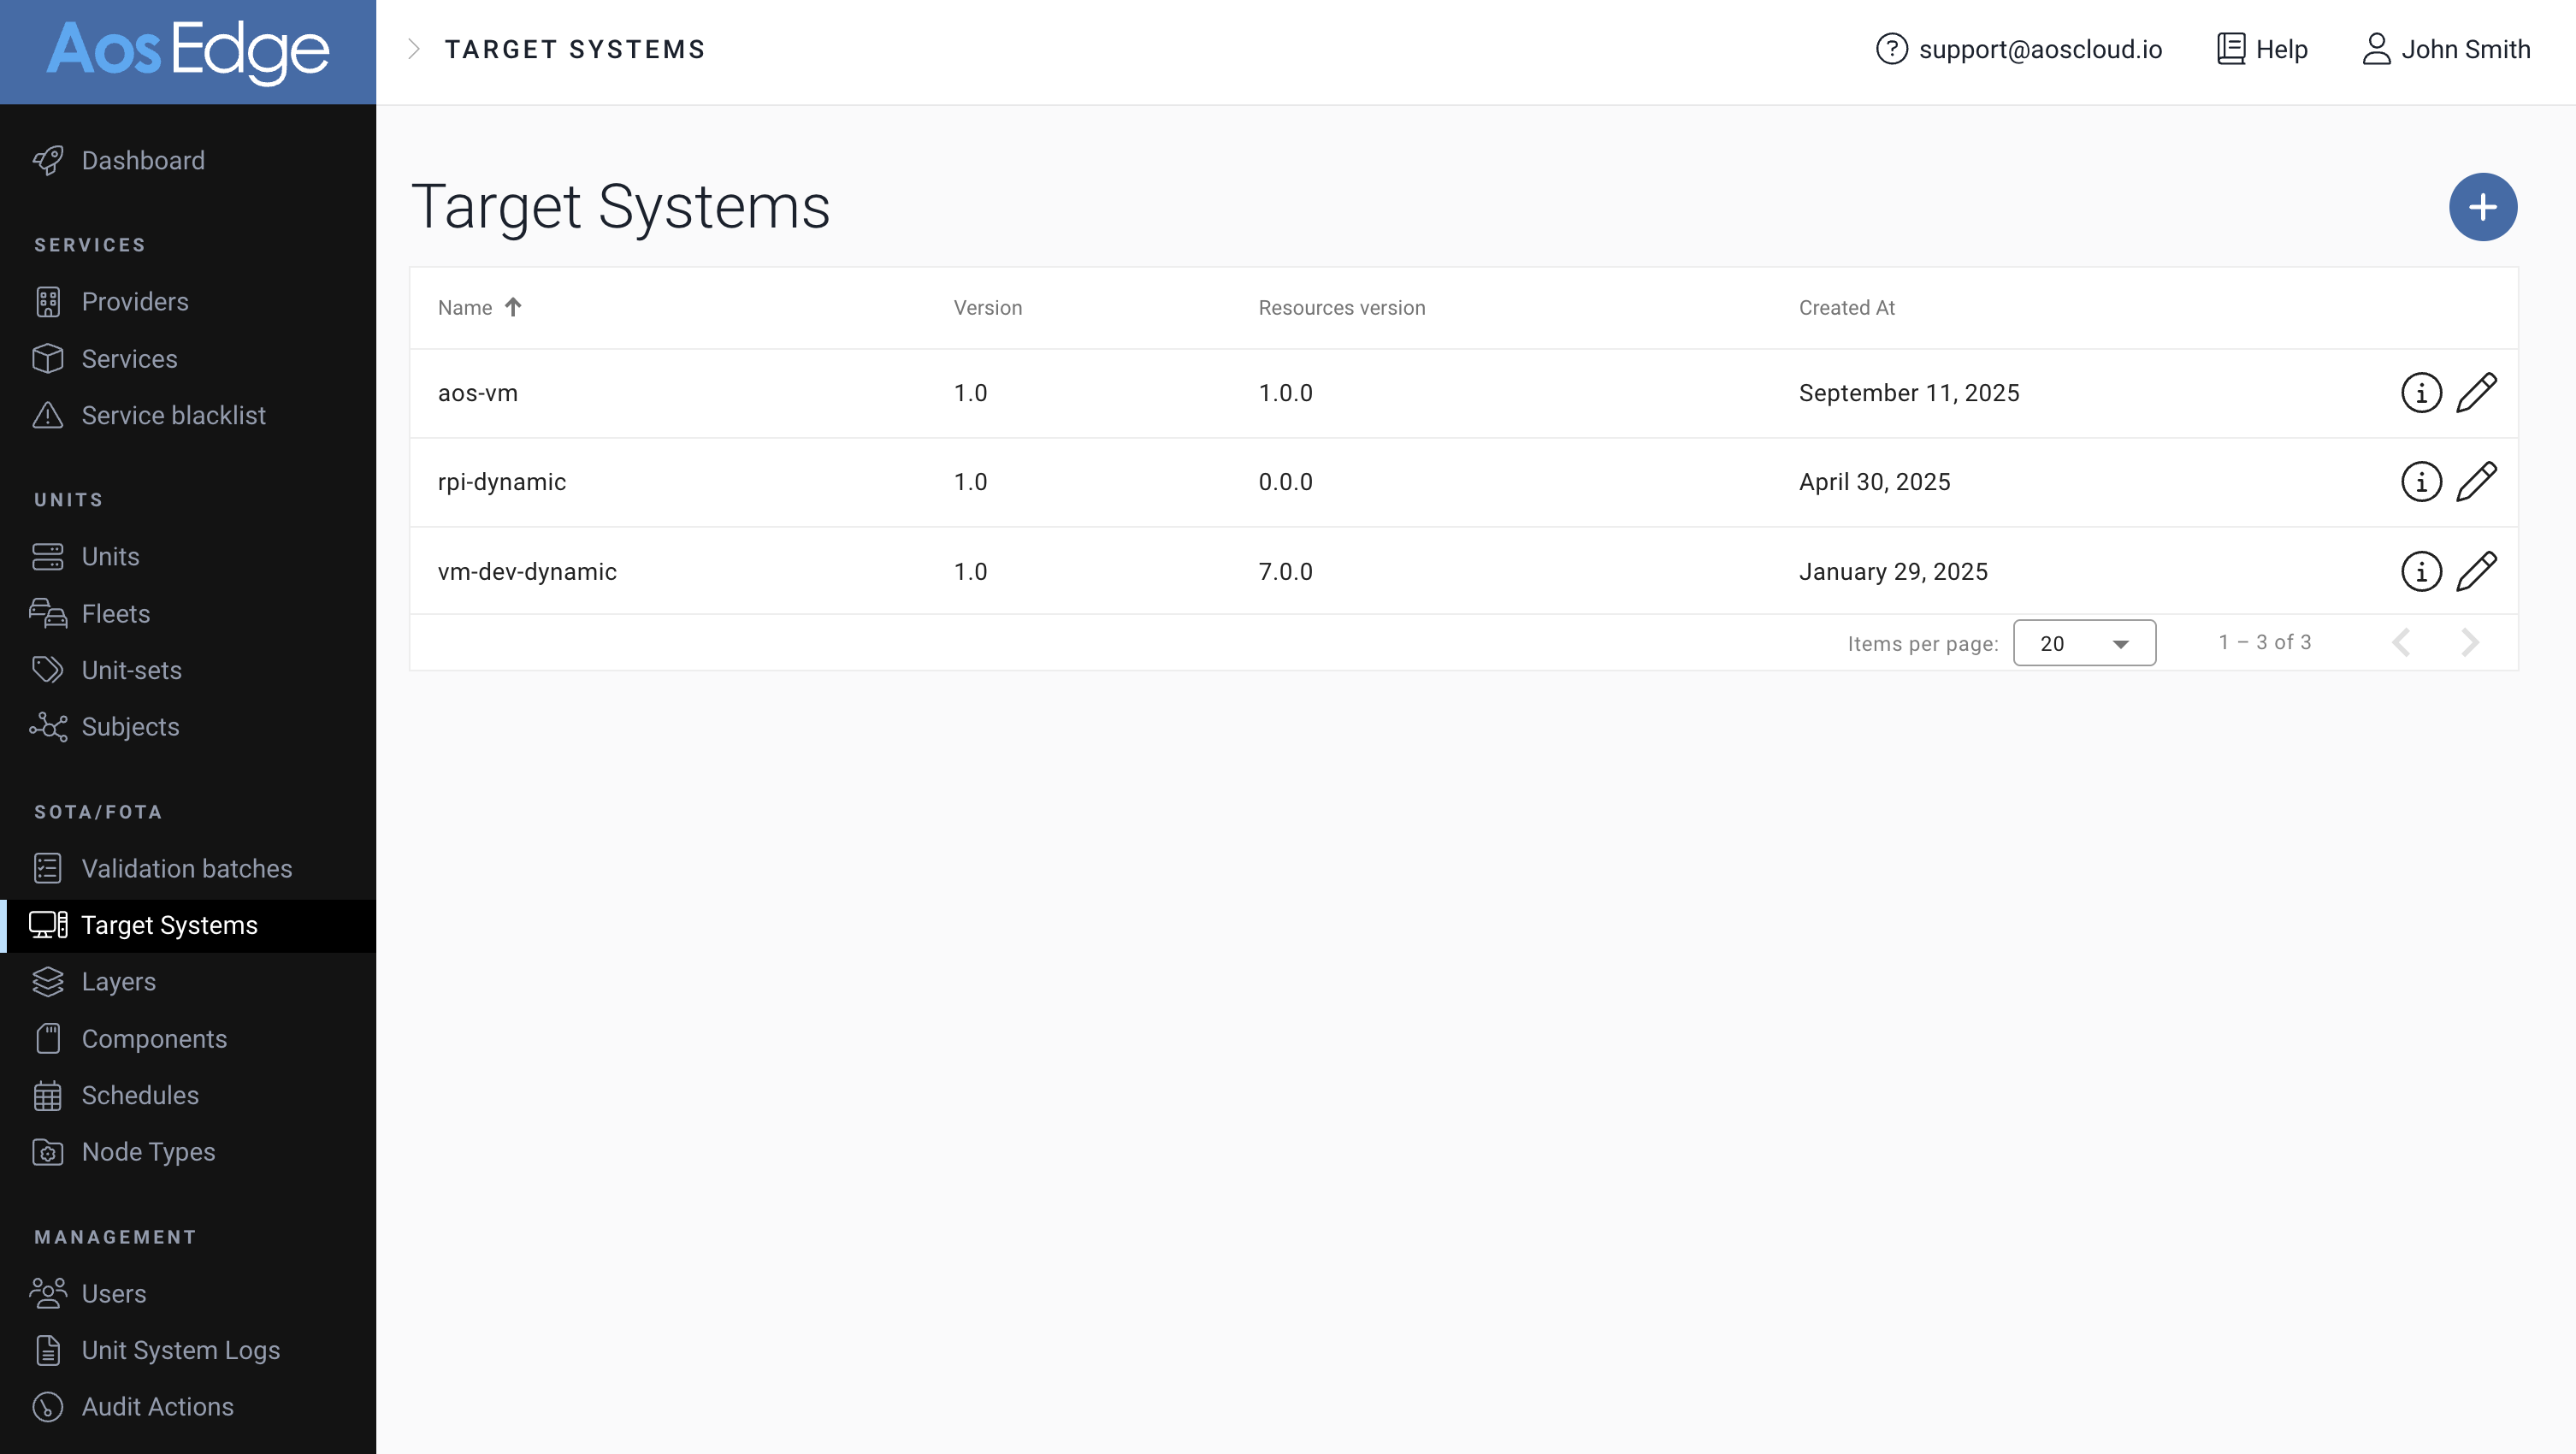
Target Systems
Go to Target Systems page. Each new system you provision will be listed here.
It is registered automatically during provisioning for newly provisioned systems. Also, it can be manually created as long as it matches with the system of Unit that will be provisioned.
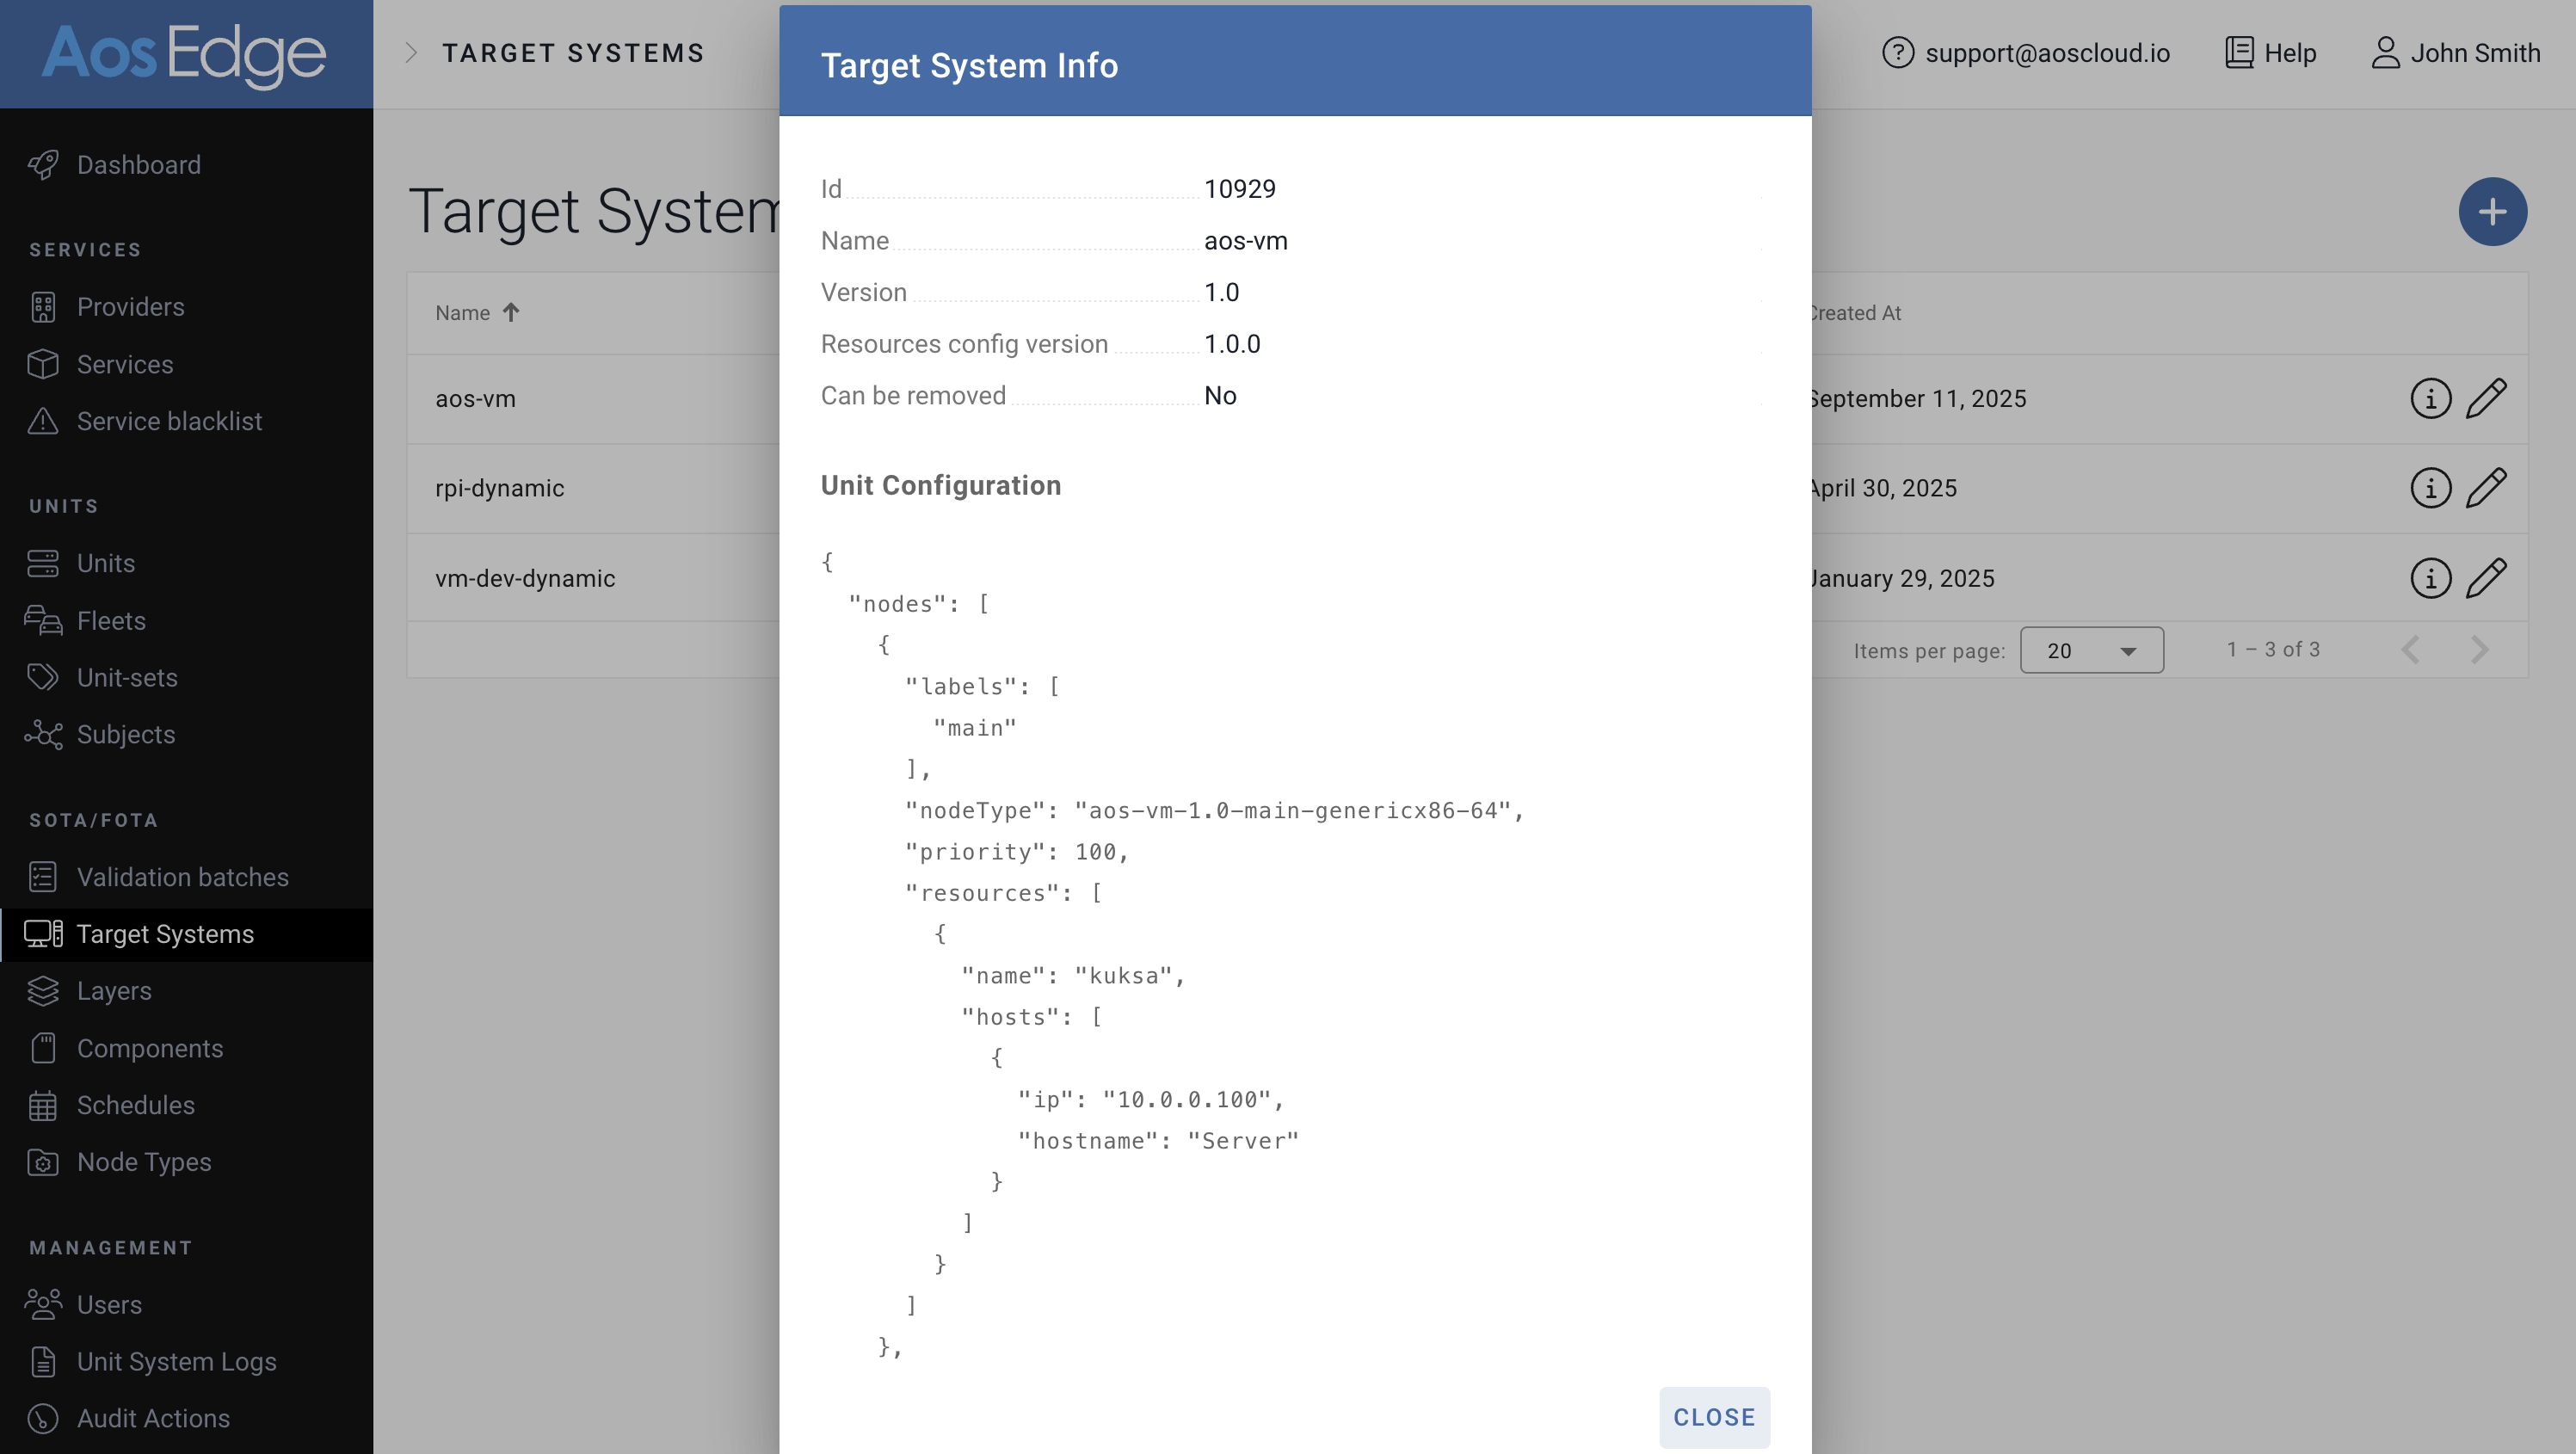
Unit Configuration
In the Target Systems page, find your target system name. Click the "i" icon.
You can confirm the unit configuration aligned with your system configuration. Unit Configuration needs to be registered manually from this UI interface. See Reference > Unit configuration for JSON format details.
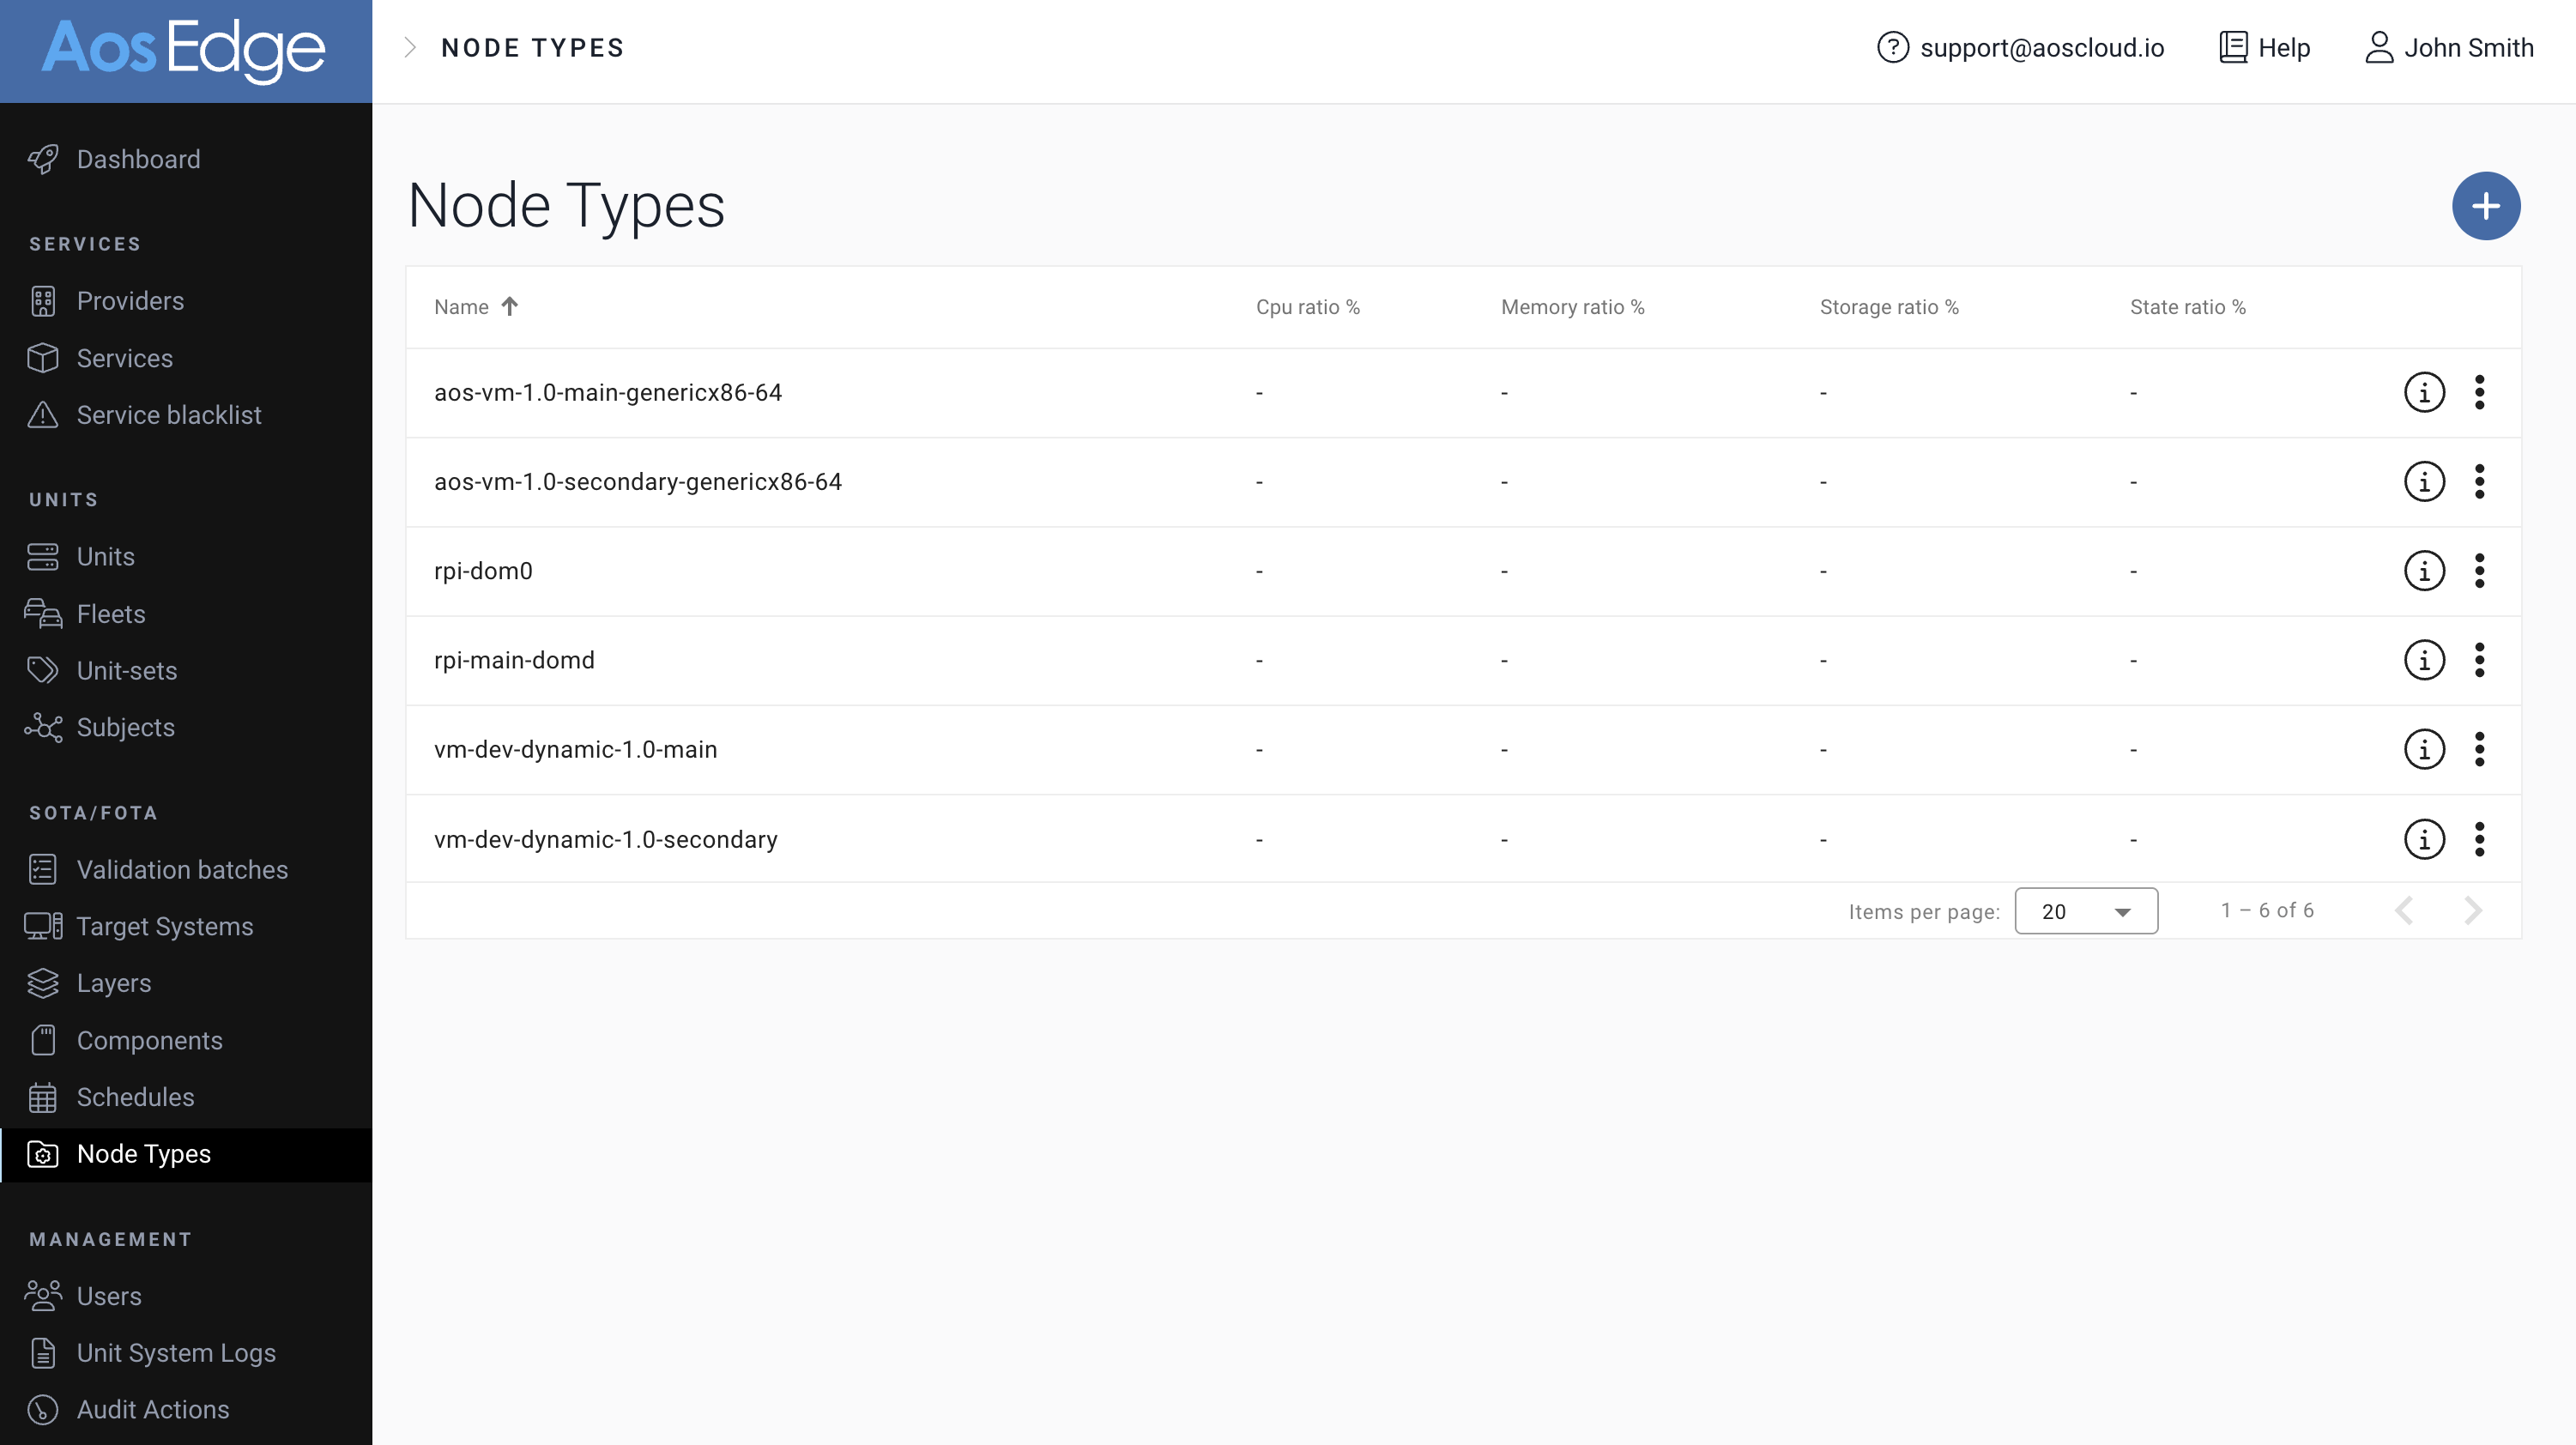
Node Types
Go to Node Types page.
Nodetypes written in the Unit Configuration will be listed here.
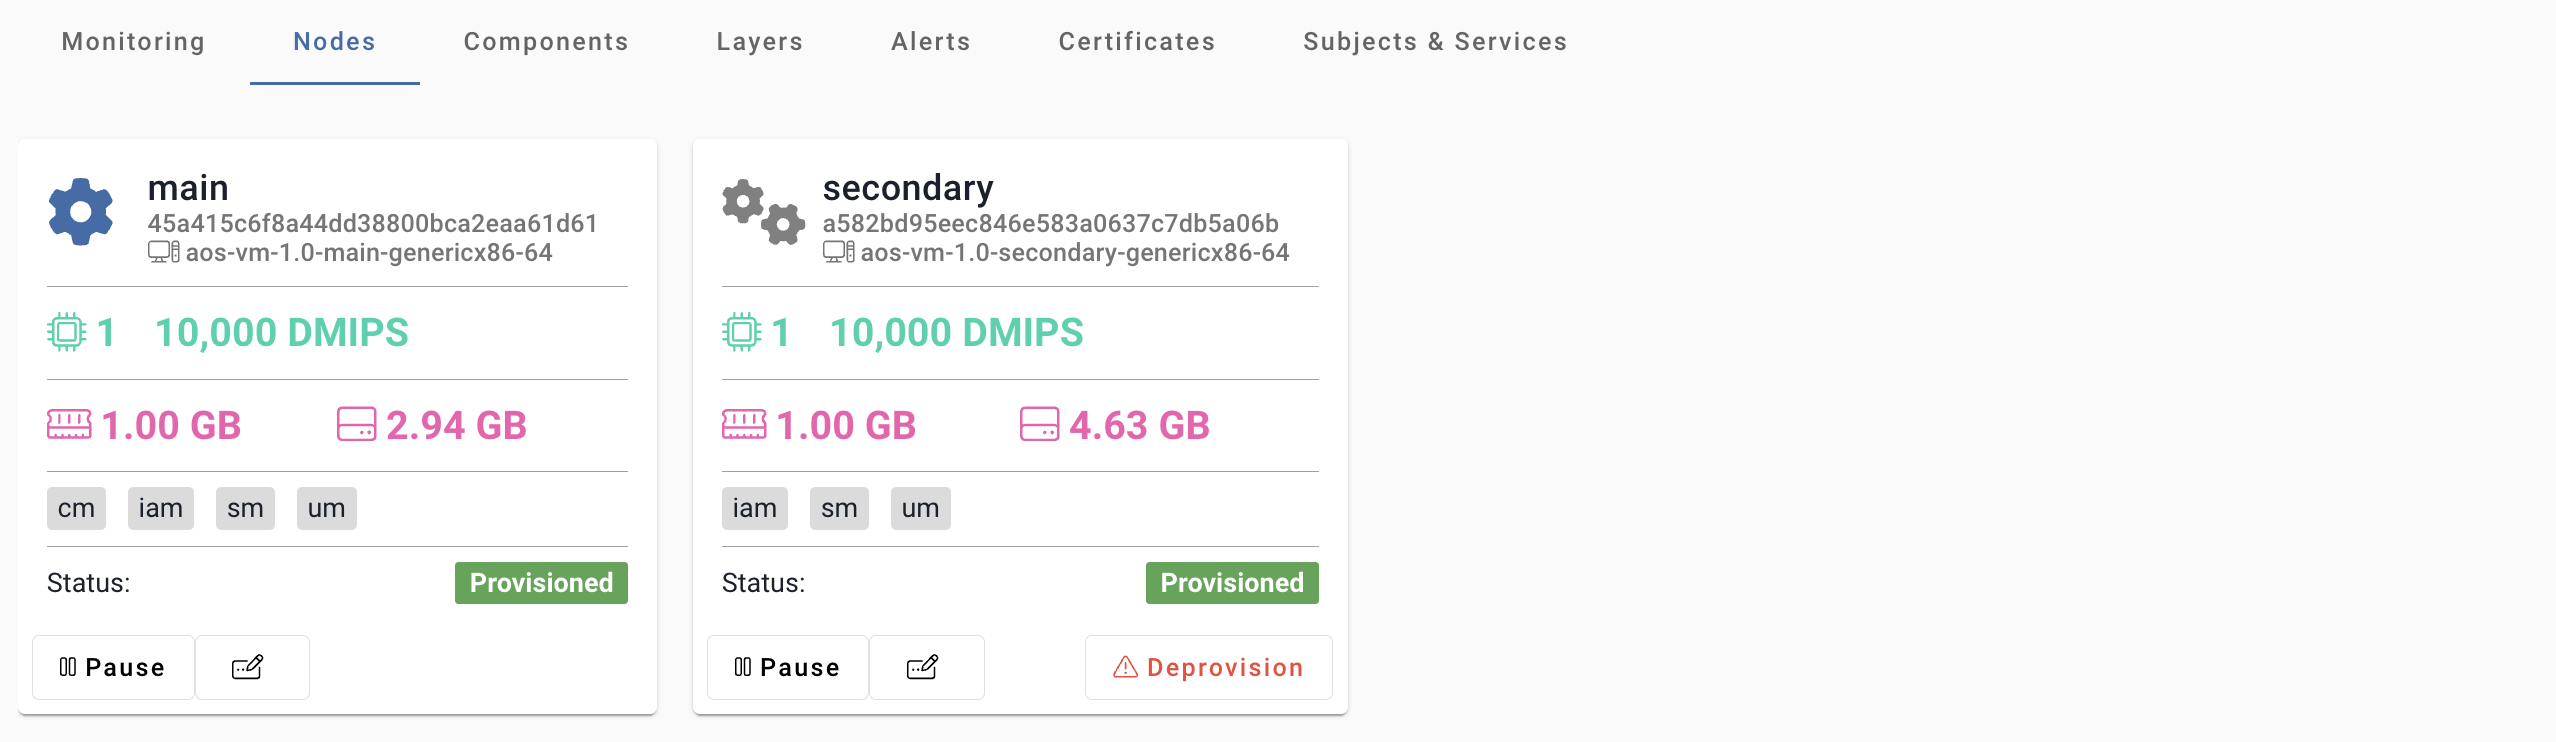
Nodes
Go to Unit detail page of the provisioned Unit.
In the Nodes tab, each node relates to the configured Node Type.