Share library between Services
If you are deploying multiple services, and they use some common libraries, it is ideal to share the common libraries between the services, so you can save resource and optimize the software configurations.
Also, as an OEM, you may want to suggest Service Providers to use some specific library.
AosEdge allows sharing a library between Services as a feature called Layer.
Below explains how to
- Create a Layer (OEM) - Layer needs to be built with the target system SDK.
- Upload a Layer (OEM) - Created Layer should be uploaded to AosEdge.
- Use a Layer (SP) - Services should declare which Layer to use.
Currently, Layer upload feature is allowed to OEM user only.
Create a Layer
Layers are prepared by OEM. They are shared by services and extend their rootfs. The layer consists of filesystem tree (files, folders) and a metadata that describes layer's content. See layer format for details.
With Yocto build
AosCore Yocto meta layers provide mechanism to create and build Layers automatically based on Yocto packages and recipes.
AosCore meta-aos repo contain
example Layers recipes that can be used as reference for creating custom Layers or can be used to extend services rootfs.
There are two types of Layers:
- Layers that depend only on host rootfs
- Layers that depend on other layer.
Based on rootfs
Create Layer recipe
In your Yocto meta layer, create layer recipe with the following path
recipes-aos-layers/your-layer-name/your-layer-name.bb.
This recipe should have the following content:
SUMMARY = "Description of your layer"

require recipes-aos-layers/aos-base-layer/aos-base-layer.inc

AOS_LAYER_FEATURES += " \
    ...
"

AOS_LAYER_VERSION = "1.0.0"
SUMMARY- add your layer description;AOS_LAYER_FEATURES- add list of Yocto recipes that have to be included into this layer;AOS_LAYER_VERSION- your layer version inSemantic Versioningformat.
Include base Layer image
Also, the layer recipe should include a base layer image:
require recipes-aos-layers/aos-base-layer/aos-base-layer.inc
Build the Layer
The layer can be built using bitbake command:
bitbake your-layer-name
By default, your layer image will be located in default deploy directory in layers folder.
See aos-pylibs-layer for reference.
Based on other Layer
Create Layer recipe
In your Yocto meta layer, create layer recipe with the following path
recipes-aos-layers/your-layer-name/your-layer-name.bb.
This recipe should have the following content:
SUMMARY = "Description of your layer"

AOS_PARENT_LAYER = "parent-layer-name"

require recipes-aos-layers/parent-layer-name/parent-layer-name.bb

AOS_LAYER_FEATURES += " \
    ...
"

AOS_LAYER_VERSION = "1.0.0"
SUMMARY- add your layer description;AOS_PARENT_LAYER- add parent layer name;AOS_LAYER_FEATURES- add list of Yocto recipes that have to be included into this layer;AOS_LAYER_VERSION- your layer version inSemantic Versioningformat.
Include parent Layer recipe
Except above variables the layer recipe should include parent layer recipe:
require recipes-aos-layers/parent-layer-name/parent-layer-name.bb
Build the Layer
The layer can be built using bitbake command:
bitbake your-layer-name
By default, your layer image will be located in default deploy directory in layers folder.
See aos-libvis-layer for reference.
Upload a Layer
Only OEM user can upload and update layers.
Create an Aos Deployable bundle config for layer. For example:
schemaVersion: 2
publisher:
  company: EPAM Systems
publish:
  tlsKey: aos-user-oem.p12
items:
- identity:
    codename: pylibs
    type: layer
  version: 0.0.1
  images:
  - mediaType: application/vnd.oci.image.layer.v1.tar+gzip
    archInfo:
      architecture: amd64
    osInfo:
      os: linux
    path: kuksa-client-b16/linux-amd64-1.0.0.tar.gz
    images:
  - mediaType: application/vnd.oci.image.layer.v1.tar+gzip
    archInfo:
      architecture: arm64
    osInfo:
      os: linux
    path: kuksa-client-b16/linux-amd64-1.0.0.tar.gz
Build in upload bundle with aos-signer tool. Run command:
~/.aos/venv/Scripts/python -m aos_signer go
After successful upload, it will appear on Deployment bundles page.
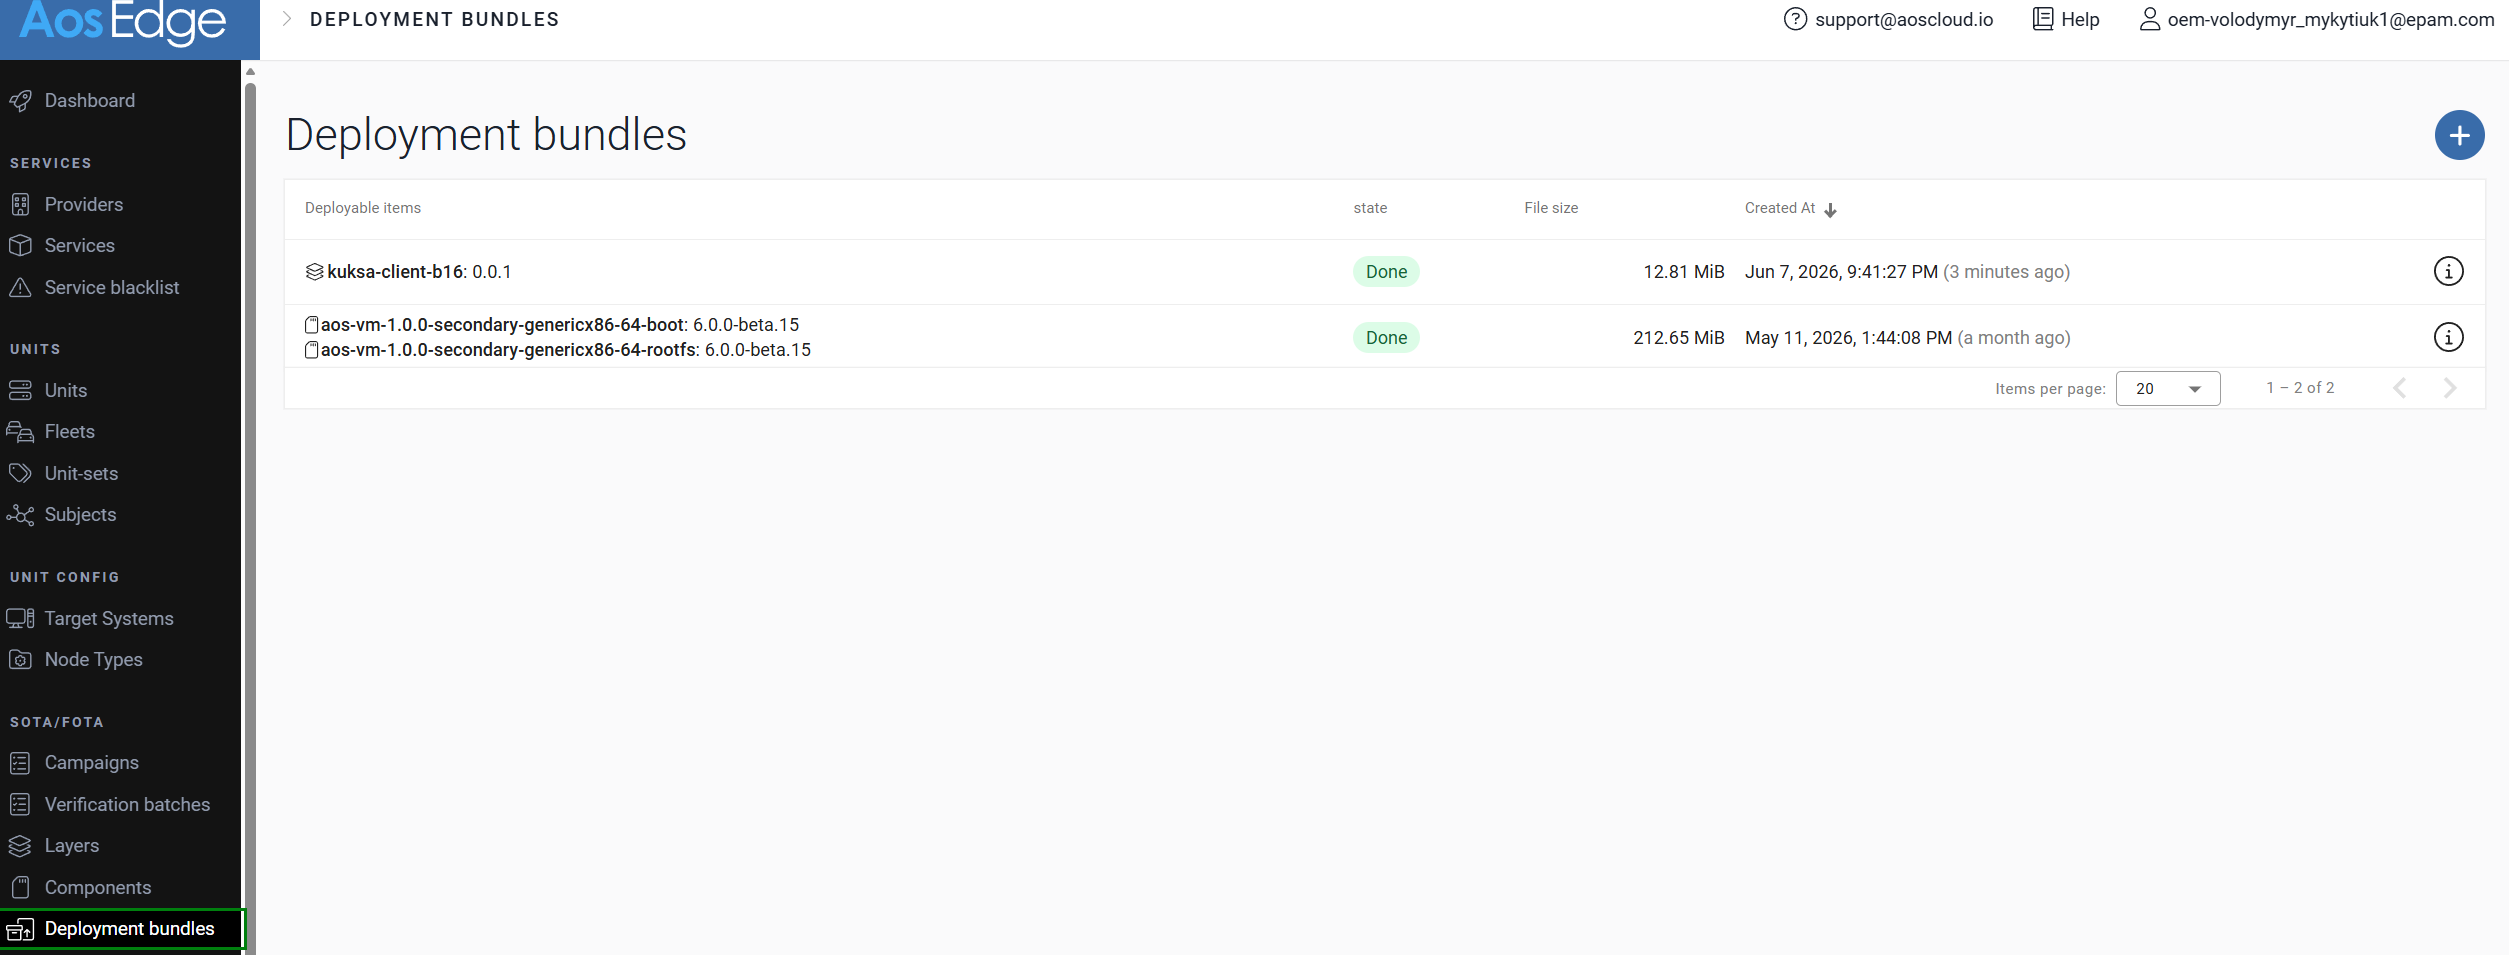
If build is successful, it will appear on Layers page.
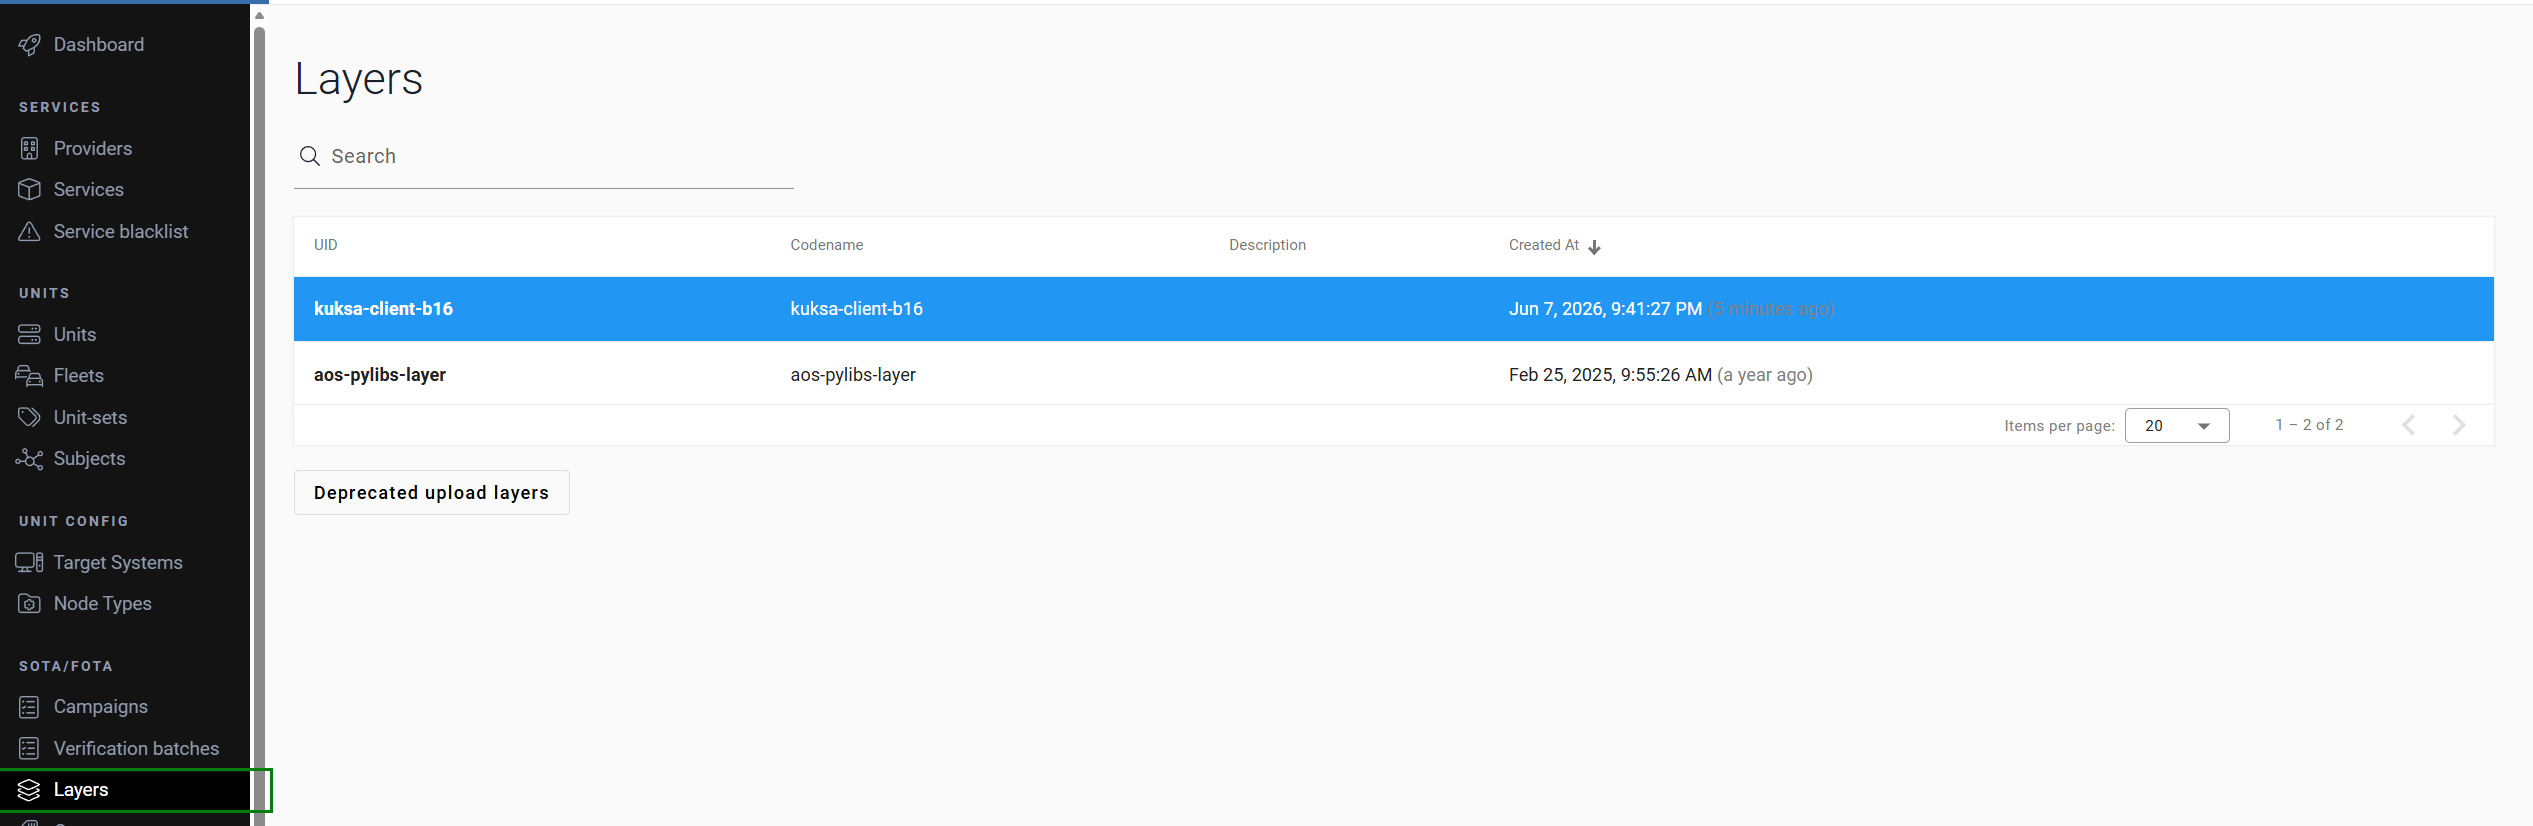
Here you may see UID of the Layer and supported platforms.
Use a Layer
Find available Layers
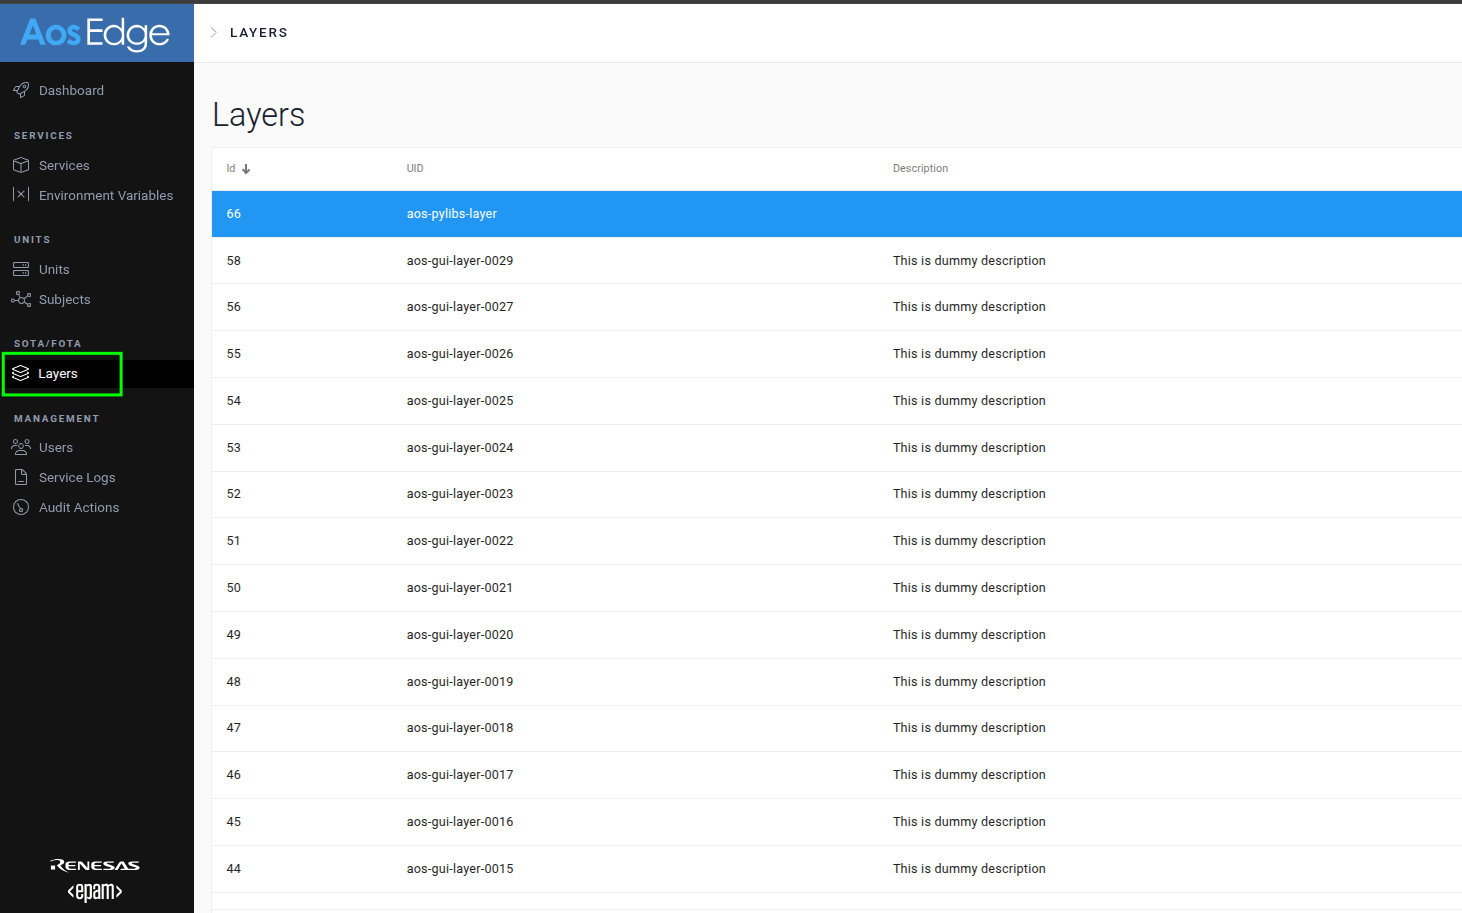
List of Layers
SP user is able to view the list of layers.
Layers detail
SP user also has access to detailed information for each layer and layer versions:
- List of libraries
- Library versions
- Other relevant layer information
When a layer is created, its metadata (including the list of libraries and their versions) is captured in layer.json.
Click on the required layer:
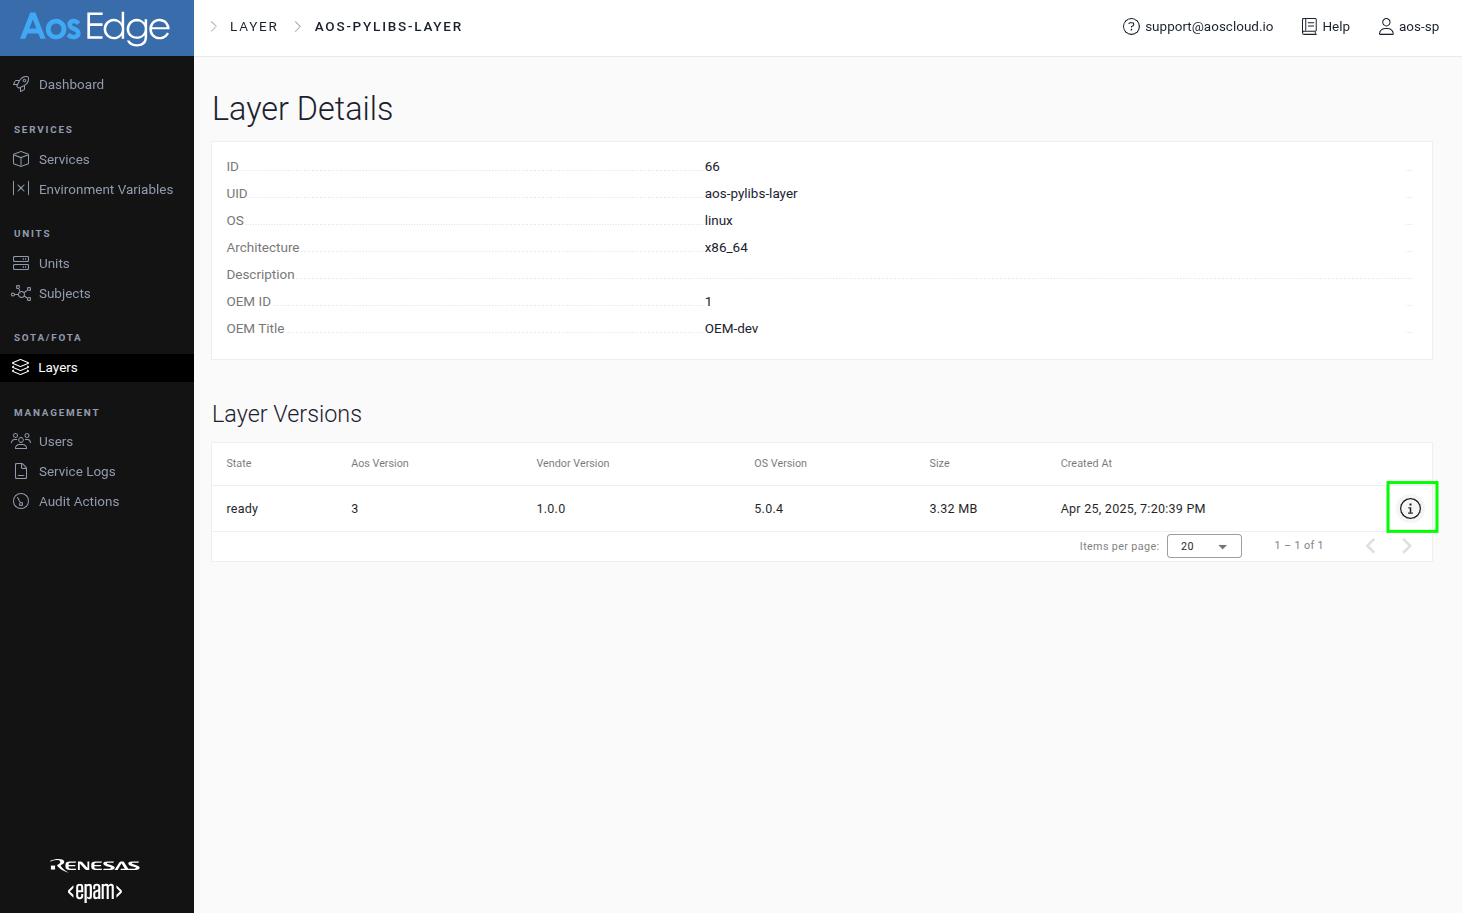
Click on the layer's version:
-
Detailed information:
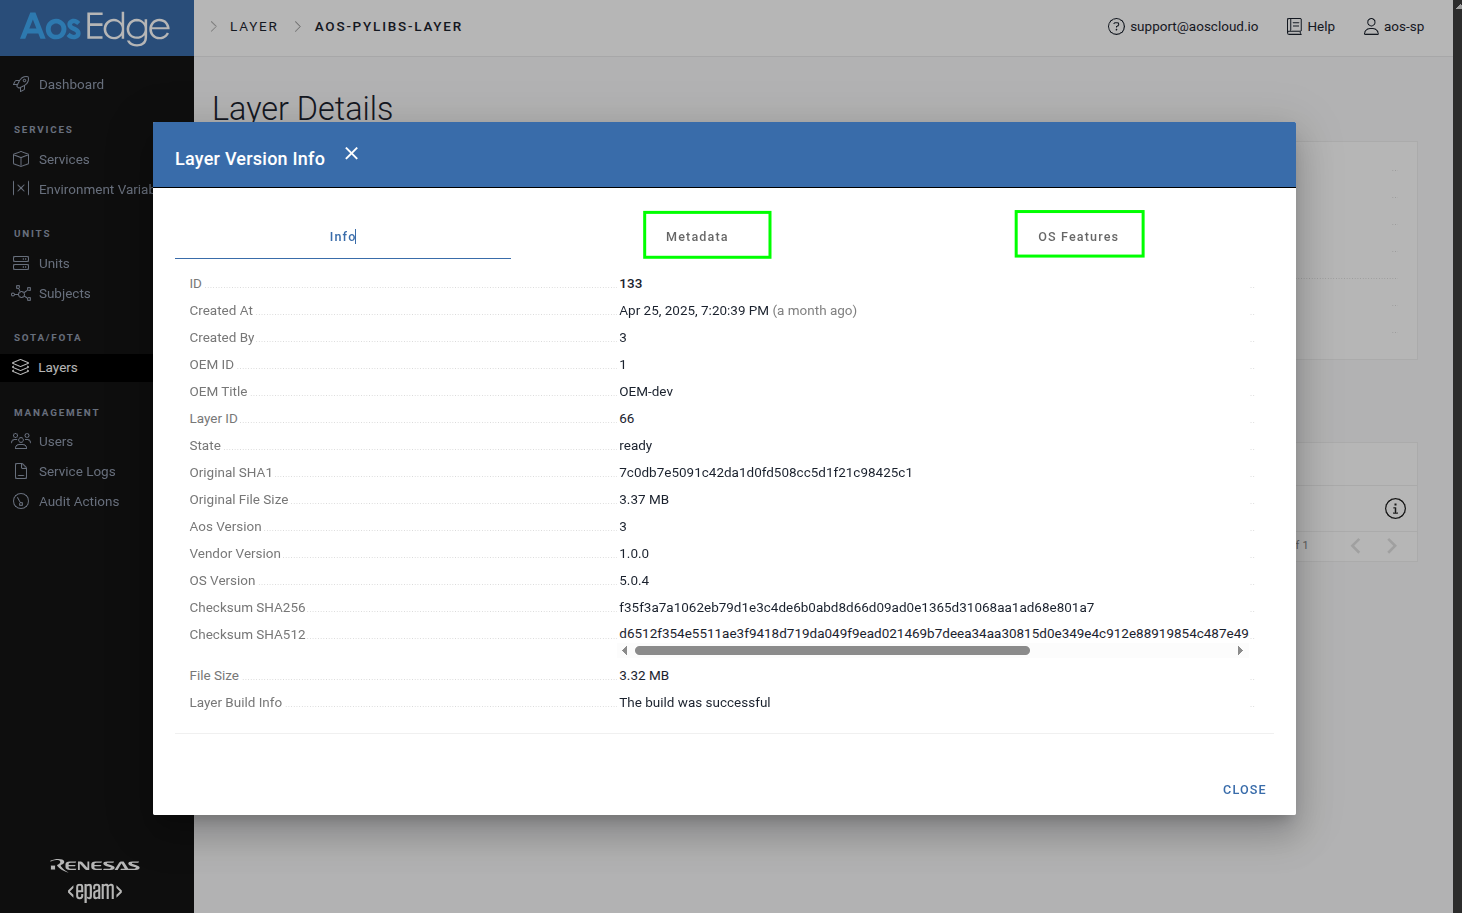
-
Metadata:
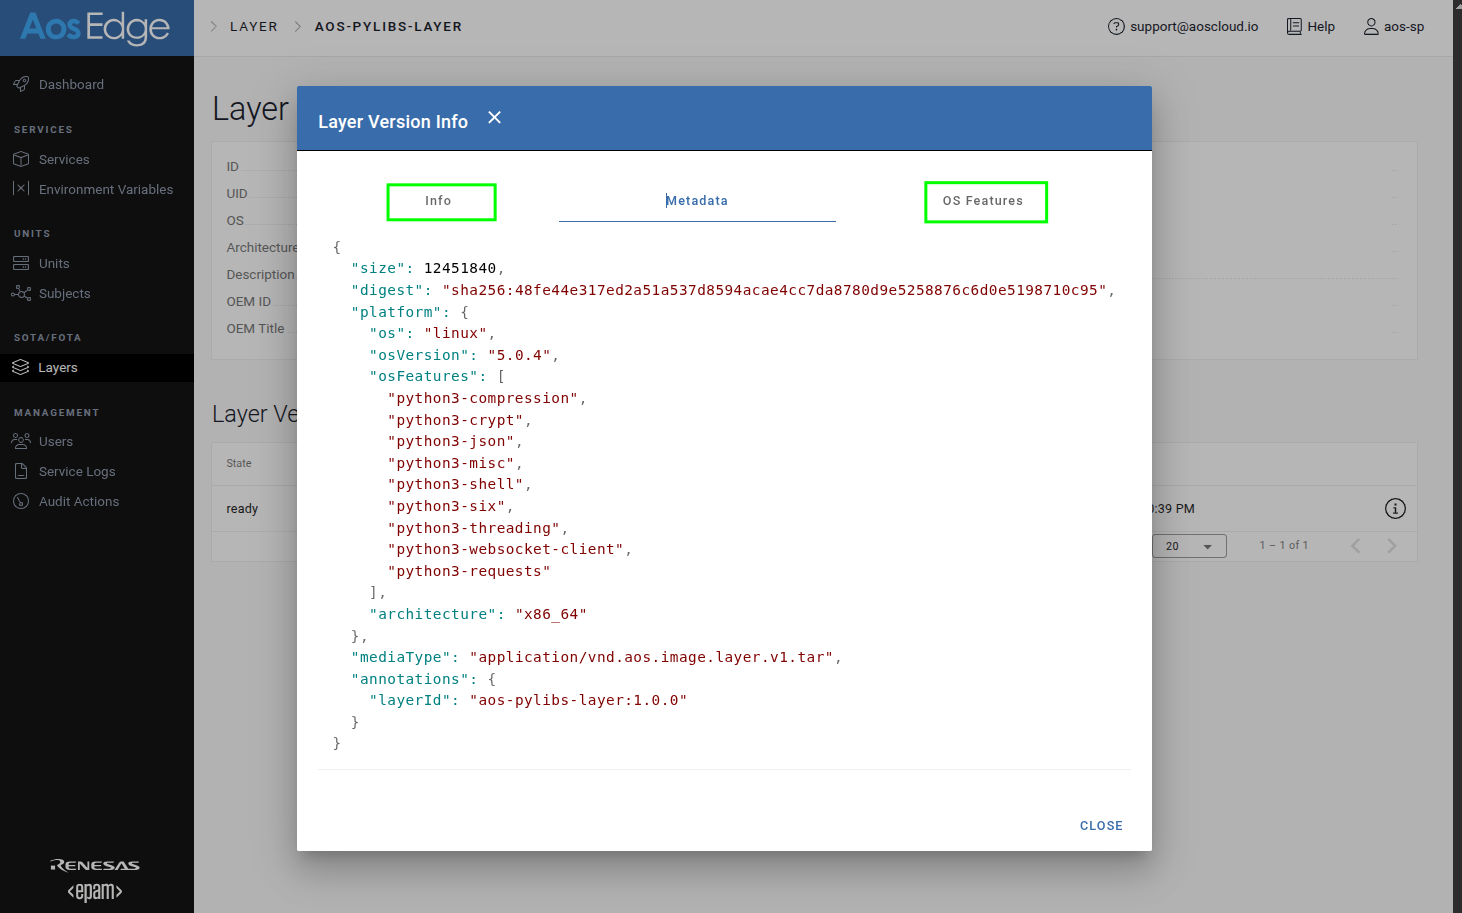
-
OS Features:
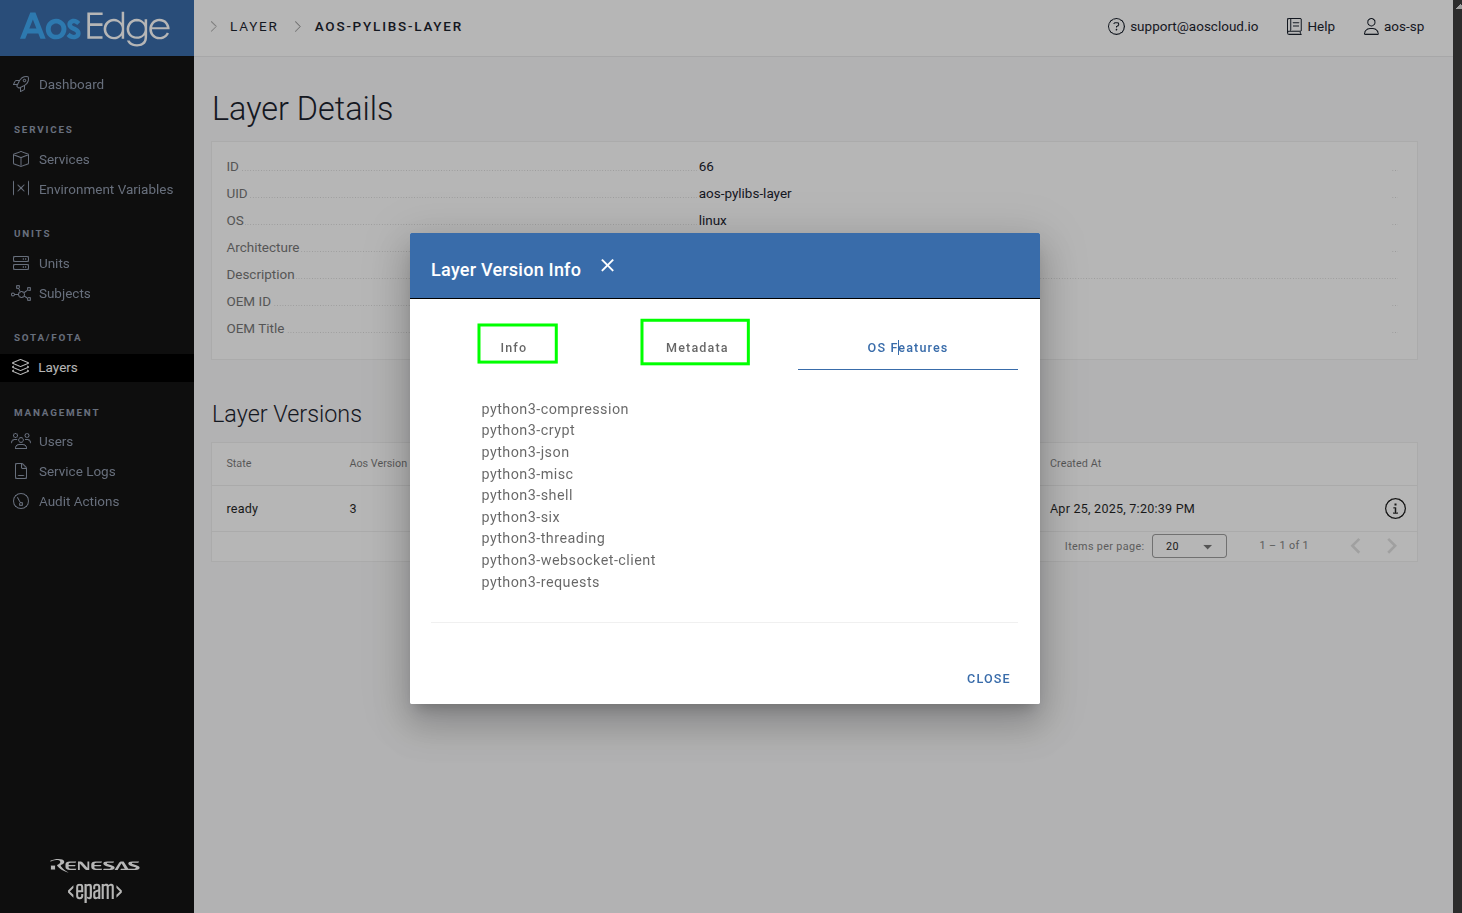
SP and OEM users can query and view the metadata of any layer within their permissions.
Configure Service to use a Layer
Only SP user can allow service to use layers.
Service config
In your service version, update config.yaml with desired layer under the configuration -> layers chapter:
configuration:
    layers:
        - uid: aos-pylibs-layer
          minVersion: 1.0.0
          maxVersion: 2.0.0
The layer version fields follow the SemVer specification.
Version compatibility
Version compatibility rules:
- Min-max range: Defines a compatible version range where:
- "min" version is included
- "max" version is excluded
- Same values: If min and max versions are identical, that specific version is required
Deploy the Service
During service deployment, the system will select a layer version that matches these version constraints.
To use the layer:
- Upload your new service version to AosCloud
- The service will be automatically deployed with the specified layer version